Hey there! This site is reader-supported and we earn commissions if you purchase products from retailers after clicking on a link from our site.
Homebrewing is a satisfying hobby. You get to make your own delicious beer whenever you want, and you can truly get creative with your recipes. All the while, you can expand upon your DIY skills, gain more knowledge about beer styles and types, and even master some new culinary skills. But have you thought about getting a green thumb out of homebrewing, too?
That’s right, you could be growing your hops at home and make your hobby even more self-sufficient.
Since buying hops again and again can be expensive (considering most are around $3.00 per ounce), growing hops is also an economical choice. Though, you can’t deny how rewarding it would be to tell others that your beer is made with homegrown hops.
Learning About Hop Plants
Ah, the incredible hop, a dioecious plant also known as Humulus lupulus that originated in Europe. What does dioecious mean? That there are male hops and female hops. The lady hop will produce flowers, the ones that we cut off and use to flavor beer, and the male plant creates pollen. The female hop plant is a hardy perennial bine (or a vine that lacks tendrils) that can either give beer it’s classic bitterness or be used for aromatics.
Hops aren’t just for flavoring either. They have an antimicrobial agent that assists with foam retention and beer preservation.
What You Need to Grow Hops Successfully
Hops grow easily and vigorously, meaning you won’t have to do much to get them growing. But you will have to tend to them to make sure the hops don’t invade other regions of your garden.
Location
Hops grow extremely well between the 35th and 55th parallels (latitude), or within Zones 3-8 in the US. Still, hops are hardy enough that you can plant them anywhere, and they will be successful. Hops are also drought-tolerant. Yet, as long as soil drainage is decent, hops can grow in areas with high precipitation, too.
Soil
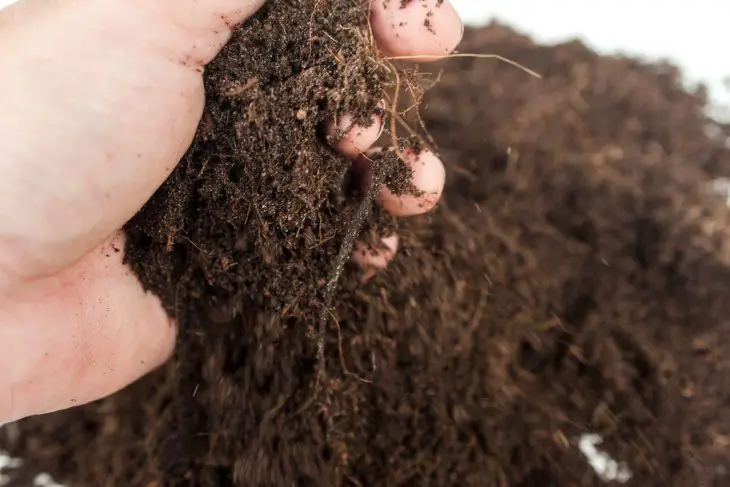
Don’t go grabbing those containers just yet. Hops do best planted in the outside earth when the pH is between 6.0-7.5. Yes, you can plant them in a container; either way you choose, drainage is essential. Consider the kind of soil you have around your home. Too much clay can cause issues, because drainage is difficult. You may need to modify the garden. Add some compost or old manure to the soil to help. Additionally, sand, straw, and gravel can assist with drainage.
Containers confine the root system, and you will notice that your plants yield far less hops than ones planted in earth. If you’re going to use containers, use only the best potting soil and mix in some compost for nutrients. Make sure you use barrels or pots that have at least a 20in (50cm) diameter.
Sunlight
You’re going to need to plant your hops in a place that receives loads of sunshine. This means full sun, or a spot that gets about 6-8 hours of uninterrupted sunlight throughout the day. Residing in a hotter climate changes this up a bit. You’re going to want to locate a spot that gets sun in the morning and afternoon but has some shade around the hottest time of the day. That will keep your precious hops from getting scorched.
Grow Space
Guess the lifespan of a hop plant. This might be surprising, but hops can live 20 to 50 years when in the best conditions. Think of all the hops you can get from a long-lasting plant like that! But if you want your hop plants to grow up big and strong, you’re going to need the ideal location and well draining soil, which we’ve already talked about.
The next thing you need is a growing space. In order for hops to grow vertically, they climb clockwise upwards using little hairlike projections. Give them some extra support by setting up a trellis or string—wire, fencing, hemp, netting—for the bines to climb. Get creative. You can set up a string alongside your house or construct a fancy trellis that the hops can, well, hop onto.
Another fancy option is to make the hops grow horizontally. Do this by setting up vertical beams then running wires from the top to the opposing post. The hops will climb up the columns or posts then along the horizontal wire. Over time, this will produce an all-natural ceiling that could cover an outdoor beer garden.
Water
Hops are thirsty little guys. During the first year, these plants require plenty of water. As the plants age, they tend to need less watering. If you reside somewhere that needs irrigation, never apply overhead water, like sprinklers and hoses, since this can cause a moist environment that causes diseases in the plants. A drip irrigation system is ideal for watering hops.
How to Purchase Baby Hops
There are more than 120 varieties of hops out there, so you will need to decide which ones are best for your planting zone. Ask yourself a few questions: Which hop varieties grow best where I’m located? What kind of beer do I want to brew? Where can I purchase hops to grow?
Also, you’re going to want to consider purchasing crowns or rhizomes instead of hop seeds. Wondering what rhizomes and crowns are? A rhizome is a piece of root cut from the female hop, while a crown is a whole plant.
A couple of tips:
- You can purchase hop rhizomes from online marketplaces like Amazon or from specialty stores
- Choose hops that are easy to grow, like Cascade and Centennial hops
- Consider using complementary plants with your hops. A great option is crimson clover, which will attract pollinators while deterring disease
Autumn is always a great time to order rhizomes, and you’ll find the varieties you’d like more easily. Suppliers will deliver your hops in the spring. Store the rhizomes somewhere cool and dark until you are ready to plant them. For instance, you can put rhizomes in a plastic bag with some water and store them in the fridge for freshness.
How to Plant Hops at Home
Hops are best planted between February and April, but your climate zone might change that. As long as the danger of frost is gone and the soil can be worked, you can plant the hops. Dormant roots from mature hops can survive in temperatures as cold as -20°F (-20°C), but new plants can easily be killed this way.
Step 1: Preparing and Enriching The Soil
When you’re ready to get those hop babies into the earth, you can’t just dig a hole and drop ‘em in, no matter how tempting. You’re going to need to remove all grass and weeds from the area. The soil also needs tilling. Keep in mind that tilling grass and weeds under the soil means they’ll just regrow and compete with the new hops. Give your baby hops the best chance for survival by limiting the competition.
Once you’ve gotten the soil tilled, start digging the holes. Make each hole about 2 feet (20cm) wide and deep. Line the hole with some commercial gardening mix and compost. Prepare a 50/50 mixture of native soil and enriched topsoil with fertilizer.
Step 2: Planting The Baby Hops
If you’re using crowns, you can go ahead and place them right into the holes you have made. Place the plant in the hole gently, cover it with soil, and make a slight mound around the plant. Water lightly. After watering, take some mulch and cover the ground to discourage pests and weeds from invading.
If you’re using rhizomes, rather than digging holes, you create mounds of dirt about 1 foot (30cm) high. Place a trench in each mound that is about 2 inches (5cm) deep. Make sure the trench is long enough to fit the rhizome properly. If roots are visible, point them downward.
Same as the crowns, cover the rhizomes with soil, gently pack it down, and then water the soil.
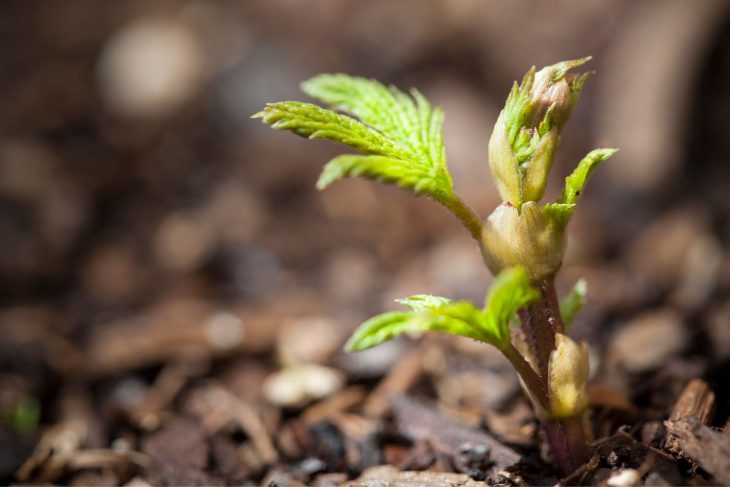
You will see hop sprouts in a few weeks to a month, depending on the variety and quality of the soil.
Step 3: Maintaining Your Hoppy Garden
Again, it is wise to water your plants often, but don’t go overboard. Additionally, you shouldn’t water the hops from the top down, as this could cause excess moisture, rot, and pests. Set up a drip irrigation system around your hop garden instead.
In July, consider removing the lower foliage and branches to help with air circulation. You don’t have to do that in August, though.
As you go through the years of maintaining your hops, you will notice that they gradually require less water and nurturing. About the time the cones have developed and are ready for harvesting, you will have mastered the art of caring for hop plants.
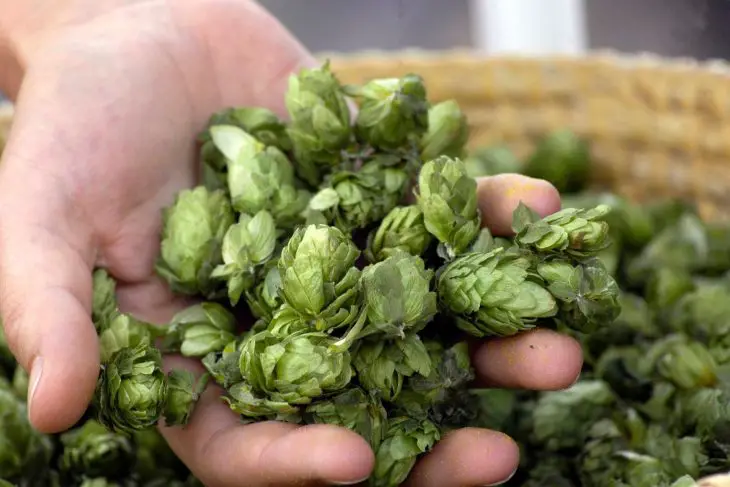
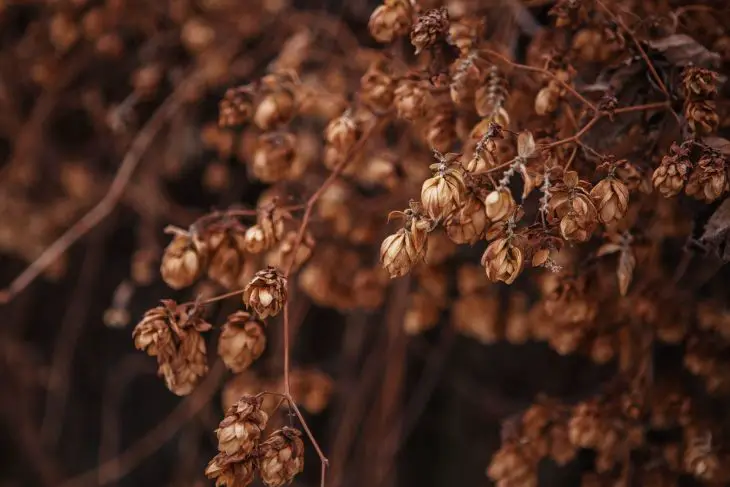
Harvesting Hops
It’s time to hold a picking party! You’ve done the planting, watering, pruning, and fertilizing. Now, you have a swath of hop cones to pluck off the bines. Be patient when you see those cones. A common mistake is picking them too early, resulting in hops with less flavor. Overripe hops are always more preferable than under-ripe ones.
Harvesting season is between mid-August and September, though aromatic hops mature faster than bittering hops. The cones send moisture and nutrients to the bracts of the plant, and that helps create more resin and oils. You might notice that the ends of the hops get a little dull in color and look papery to the touch.
Here are some ways to check for hop ripeness:
- Before picking, give the cones a gentle squeeze. They should feel dry and light and will spring back to normal after a squeeze. This means they’re ready.
- Pick the cone. Roll it around in your palm and smell it. If you get a scent of onions and cut grass, the cone is ripe.
- Next, roll the hop near your ear. You should hear a cricket chirp if it’s ready to harvest. If the hop turns orange or smells foul, it’s too ripe.
For a first year bine, leave them attached to the plant. This enables the nutrients to flow back down to the root system, giving the hops plenty of nutrients to survive the winter. After the first year, you will need to winterize the plants by trimming down the bines. Cover the mounds with some mulch and you’re set.
Expect 1-2 pounds of dried hops per plant once they have matured.
Drying and Storing Your Homegrown Hops
What? You thought you were finished? Never! Freshly picked hops need to be dried or put directly in the kettle for whipping up a batch of beer. Since you most likely are not going to pick and brew, you need to know how to dehydrate the hops so their flavor is preserved.
There are three important hop drying factors:
- Moisture
- Heat
- Time
Drying shouldn’t last more than three days, since oxidation and isomerization will happen after that. You can speed up drying the hops by placing them on a baking sheet in the oven. Watch them carefully and make sure the internal temperature never gets above 140°F. Check the readiness of the hops every 20 minutes until they are fully dehydrated.
Alternatively, you can use a drying screen. Place some landscape fabric over the hops and put the screen somewhere dark. Occasionally fluff the hops so that the moisture on the underside of the cones is exposed to air as well. You can use an oscillating fan to speed up the drying.
You will know when a hop is dry enough when the central stem is brittle enough to snap. Once you’ve finished the drying process, place your treasure trove of hops into vacuum-sealed bags and stuff them into a freezer.
Wrapping Up
There you have it: an easy way to grow hops at home. It might sound like a lot of hard work, but it’s truly rewarding to have your garden supplying your hobby. And just think about how amazing your homebrewed beer is going to taste. Keep in mind that you will need to perform upkeep before winter; but the hops will be back every year to provide you with more delicious cones!
Recommended Reading
Sweet Beers: Your Ultimate Guide to Drinking and Brewing Sweet Beers
If you are looking for more information on sweet beers, this Ultimate Guide to Sweet Beer will tell you everything you need to know and more.
How to Malt Barley: 18 Easy Steps To Malt Barley At Home
Barley is often seen as the very essence of beer, so knowing how to malt barley is important. If you are a home brewer who is eager to learn how to take on this task right from the comfort of your own home, you’re in luck.
How and Why to do First Wort Hopping
Does trying out new brewing techniques make you nervous? Don’t worry. That happens to be the first reason you should give first wort hopping,
Bottle Priming: How to Use Priming Sugar to Bottle Beer
As with all things related to home brewing, using priming sugar is an art that requires some skill and knowledge to get right. If you have ever wondered about bottle priming, you have come to the right place.
Dry Hopping Your Beer Like a Pro
The concept around dry hopping is very basic. You grab some hops and toss them into the fermenter. Then, you wait a few days for those hops to infuse their aroma and flavor into the beer.
What Are Yeast Nutrients? How To Use Them Right
Yeast nutrients can do a world of good for your beer and its flavor. What are yeast nutrients and why are they so important? Time to get your answer.
