Hey there! This site is reader-supported and we earn commissions if you purchase products from retailers after clicking on a link from our site.
Beer enthusiasts rejoiced when homebrewing became a thing. Saving money, experimenting with ingredients, and getting to spend time on a hobby are all excellent reasons to start homebrewing. The journey of making a perfect beer to show off to your friends is not as easy as it may appear. Homebrewing beer requires some skill and understanding, which is why every beginner should know the common mistakes people make and how to avoid them.
We have gathered up a list of common mistakes that most homebrewers make and compiled them in this homebrew troubleshooting guide. If you have made any of the mistakes listed, don’t worry. You will soon know where you went wrong and how to avoid such mistakes in the future.
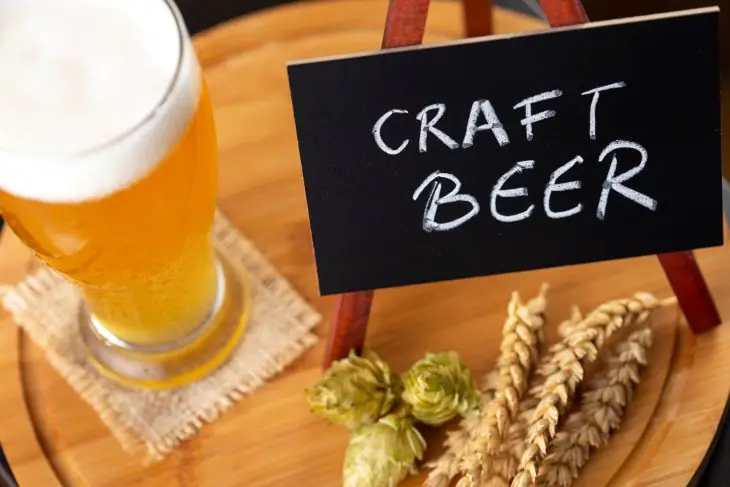
Table of Contents
- 1. Not Cleaning or Sanitizing Your Equipment
- 2. Using Unfiltered, Low-Quality Water
- 3. Burning The Extract
- 4. Improper Measurements
- 5. Give The Brewing Bag a Squeeze
- 6. Using Outdated Ingredients
- 7. Underpitching Yeast
- 8. Not Aerating The Wort Completely
- 9. Using a Fermenter That’s Too Small
- 10. The Dreaded Boil-Over
- 11. Tossing Yeast Into Hot Wort
- 12. Using Unfiltered Wort
- 13. Hiding The Boiling Wort
- 14. Letting The Wort Cool Uncovered
- 15. Oxidized Beer
- 16. Exposing The Beer to Direct Sunlight
- 17. Premature Bottling
- 18. Overloading The Flavors
- 19. Beginning The Siphon With Your Gob
- 20. Missing Out on Priming Sugar
- 21. Not Following Instructions and Getting In Over Your Head
- 22. Two Words: Temperature Control
- Practice Makes Perfect
1. Not Cleaning or Sanitizing Your Equipment
The first step to undertaking any homebrewing adventure is to have your tools ready to go. If you want clean tasting beer, you need clean equipment. Simple, right? Not really. Homebrewing can be messy, and you have to stay on top of things to avoid contamination.
But here is the catch: cleaning and sanitizing are not the same thing. 2020 probably made that apparent to most people. Still, it is important to note that cleaning means removing dirt and residue from proteins, fats, and other crud that could upset the fermentation process or destroy the beer in some other way. Sanitizing is merely killing bacteria, yet standard cleaning practices usually miss this step.
That is why you need to purchase a no-rinse brewing sanitizer. There are all kinds of formulas out there. The main similarity is that all sanitizers get rid of the microbes that contaminate your brew.
2. Using Unfiltered, Low-Quality Water
The water running from the tap might taste good enough to whip up coffee in the morning, but that doesn’t mean it is going to add anything to your beer. Chlorinated water that has not been filtered will result in plastic or metallic taste. Also, we must not overlook the pH and ions in the water. It could alter the gravity, finish, and pH balance of your beer as well.
You will notice that many beers depend on a specific type of water, as described by their name. That is why German beers taste different from Croatian beers. For instance, the pilsner was crafted with soft water with little to no minerals. Why is that important to note? Because you cannot make certain beers without using a certain kind of water. You wouldn’t expect a pilsner to taste the same if it was made with hard water, right?
If you want to use your local water, purchase a water test kit to determine which minerals are present. Optionally, you can buy filtered water from the supermarket. Add in the minerals you need for the beer yourself. That way, the balance and flavor is assured.
3. Burning The Extract
Some brewing mistakes are unanticipated, particularly for beginners. One of those issues occurs when malt settles on the bottom of the brewing kettle and gets burned from the heat. On your first few tries, you may not even realize it happens. Hopefully, you now know to be vigilant during the brewing process and will not end up scraping out ruined beer.
If you plan on using malt extract, removing the brew kettle from any heat source. Stir the extract into the liquid and make sure it has been dissolved before doing anything else.
Using a kettle with internal heating? Keep it sparkling clean. As mentioned previously, residue can muck up the results. Keep the heating element clean and remove any sediment that is clinging to the kettle, since it can add odd flavors to the beer.
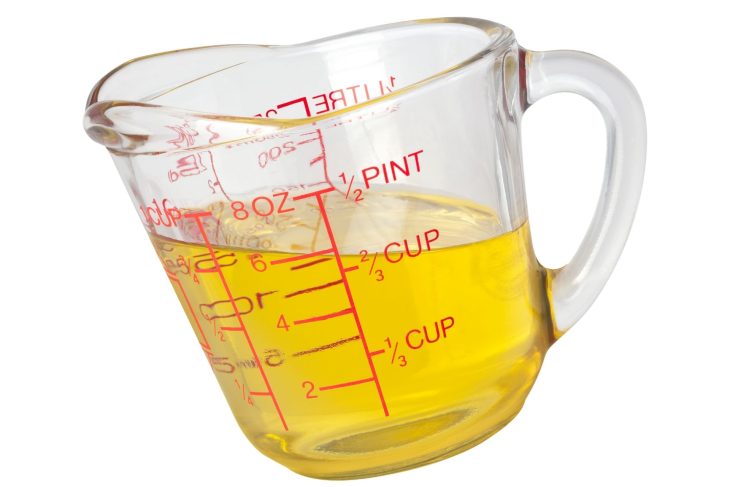
4. Improper Measurements
At the end of the day, homebrewing is less art and more science. Beginners tend to think that getting creative is going to produce fabulous beer on the first try. What you really need to do is follow the steps of the recipe and precisely measure out every single ingredient. Doing so will prevent you from making messy, costly mistakes.
Here is one thing to add to the tool kit: a stainless steel digital pocket scale. Second, you should always measure ingredients by their dry weight. Never measure volume. With a high-grade scale, you will be able to nix any unexpected results by receiving accurate measurements.
5. Give The Brewing Bag a Squeeze
There are a couple of routes to getting home brewed beer, all of which may require homebrew troubleshooting sooner or later. One of those methods is brewing in a bag. You may be attempting to steep those expensive grains to get an extra punch of color or flavor, and in that attempt, you do one of the major sins of homebrewing beer.
You squeeze the bag—with zeal.
Whoops. A slight squeeze can help with the brewing in the bag. Squeezing the bag like it was a stress ball, on the other hand, is going to cause compounds known as tannins to secrete from the grains. The result? Beer so bitter you will think the air was sucked from your lungs.
The better way to brew in a bag is this: first use hot water to extract any wort then drain the bag, giving a chance for the grain to drip-dry before you throw them out.
6. Using Outdated Ingredients
In the same way you would never use curdled milk in a cake and expect it to taste good, you shouldn’t use spoiled ingredients in your beer. It is a rookie mistake. You think that grains and hops have a longer shelf life. The truth is that these things spoil quickly once the packaging has been opened.
To get better tasting beer, make sure you are using high quality, fresh ingredients. Any leftovers should be stored correctly. Otherwise, you will end up with noxious smelling beer the next time you brew some up.
7. Underpitching Yeast
Do you know how much yeast you are supposed to use? It’s a common mistake. Many beginners end up using too little yeast, and that gives them a sickly sweet beer with not enough gravity. Underpitching yeast is also easy to do when making large amounts of beer or trying to craft high gravity beers.
You will need to pay attention to the yeast package and the cell count. Again, follow the instructions on the package.
Brewing the same kind of beer regularly? Get yourself a yeast starter. You will save more money and time.
8. Not Aerating The Wort Completely
First, let’s talk about wort, since we are going to be mentioning it a bit throughout this article. Wort is also called a “beer starter.” It is the liquid that is created during mashing, when malted grain starches are converted into sugar. Once the starches are extracted, wort goes through a lautering process, where things like grain husks are removed from the liquid.
A beginner mistake is to not give the yeast in the beer the oxygen it needs to survive. Once the wort has been cooled, you need to add some air to the mixture. For ideal fermentation, you need about 10 parts per million of oxygen.
One easy way to reach the recommended oxygen concentration is to shake the fermenter for about 40 seconds. A vigorous shake grants you around 8 ppm.
9. Using a Fermenter That’s Too Small
Brewer’s yeast is a type of single-celled fungus (Saccharomyces cerevisiae) that is used in bread and beer production. When added to wort, the yeast interacts with the sugars, foaming up as the microflora feast, and eventually creates beer. The foam has to go somewhere. Regardless of the fermenter you are using, be it a conical fermenter or a carboy, too much foam in a tiny fermenter spells trouble.
Unless you want a frothy volcano spouting off, make sure you are getting an appropriately sized fermenter. The ideal size is one that has 20 percent more volume than the batches of beer you make. For instance, you will need a 6 gallon (23 liters) fermenter if you plan on making 19 liters of beer.
10. The Dreaded Boil-Over
The boil-over is kind of like the boogieman of the homebrewing world. You don’t ever want to see it in real life or it will haunt your dreams forever. Okay, the boil-over is not that bad, but there is a possibility of it happening if you do not measure correctly and keep an eye on the heat. It is annoying to clean up, though. When the sugars and other chemicals in the beer bubble up and over, you get a horrible mess of slimy, sticky goop to contend with.
So, how do you prevent a boil-over? It’s simple, really. Regulate the temperature as you boil the wort and stir. Another way to prevent the bubbling monster is to put glass marbles in the pot. The marbles work to break down bigger bubbles, preventing the pot from burping up sugar. Since glass marbles are also inert, you do not have to worry about them getting damaged or adding bizarre flavors to the beer.
11. Tossing Yeast Into Hot Wort
Yeast does not like to be boiled. Dumping yeast into a liquid around 21 degrees C (70 degrees F) will either shock or obliterate the brewer’s yeast. Even if the yeast survives, their constitution will be too weak, and they will be unable to carry through the entire fermentation process. You will end up with watery, sweet beer.
In short: Cool the wort before pitching the yeast.
12. Using Unfiltered Wort
After the wort has been boiled, you will notice that there is a thick, sludgy sediment blended in. Using wort that contains this malty mess will be problematic. First, the thick substance can clog the wort chiller. It may also alter the flavoring of your homemade brew.
How do you avoid this? When the hops are entering the primary fermenter, filter them. This will remove proteins, starches, and other elements that could ruin your beer. Also, do not overfeed the yeast when conditioning the bottles. You will also experience less explosions.
13. Hiding The Boiling Wort
Boiling is where the beer begins to become something. The wort in the mixture starts to release sulfur, which needs to be released into the air. Keeping a lid on things spells trouble. The kettle should remain uncovered as the wort boils, because the sulfur will get trapped within the condensation on the lid then drip back into the liquid below.
Sure, some of the sulfur compounds add antioxidants to the beer. The rest are not as helpful—and they taste horrendous. No one wants beer that tastes like old fish, cabbage, or rubber.
Besides, covering the brew kettle also increases the chance of having a boil-over. So, in order to prevent cabbage flavored beer, keep the lid of and let the sulfur diffuse into the air.
14. Letting The Wort Cool Uncovered
“Wait, so now I need a lid?” you grumble. Yes! As terrible as leaving the boiling beer covered can be, not putting a lid on the kettle as the brew cools is just as bad. As nice as it is for the wort to cool swiftly, a lid acts as a barrier from anything that could fall in—bacteria, food particles, dust, pet dander—and mess up the beer.
The lid is a line of defense. Yes, it might slow down cooling just a bit. If you are rushing to get the beer brewed, consider purchasing a wort chiller. That enables faster cooling without introducing any contaminants.
15. Oxidized Beer
As we have stated multiple times, you need oxygen to make this whole homebrewing thing work. Air is a godsend when we are talking about yeast. Unfortunately, there are times when too much oxygen exposure can kill your beer.
Oxygen can be tricky, because it will sneak into the brew after you have completed the primary fermentation. When that happens, you can curse your luck. Oxidation will have occurred, and that is something you don’t want to happen. Oxidation is a one way street to flavor destruction and disappointment.
Oxidation can be avoided by siphoning the beer from one vessel to the next during fermentation. Keep the siphon line below the surface of the wort getting transferred. Go slowly to avoid any splashing, as that may pull air into your wort.
16. Exposing The Beer to Direct Sunlight
Don’t bathe your beer in sunlight until it is in the bottle for drinking. Sunlight and fermenting beer do not mix. In fact, the sun’s rays will cause a photochemical reaction that interacts with the hops in the beer. Think of your brewing beer as a vampire. It has to stay away from the sunlight until it is ready to party.
Protect your batch by acquiring a fermentation chamber, which will shield wort from sunlight.
Similarly, when you start bottling your beer, using amber-colored bottles. The amber glass is able to cut down on ultraviolet wavelengths and protect the flavor or your beer.
17. Premature Bottling
Homebrewing can be both exciting and boring, depending on what point of the process you have reached. There will be moments where it feels like all you are doing is waiting. As the days pass, you may be tempted to bottle the beer ahead of schedule. Don’t do that.
Remember: Patience is key. Anything worth having takes a little time to obtain. You might be tricked into bottling too early if you do not properly gauge fermentation. The process can accelerate dramatically once fermentation reaches a stage called “high krausen.” What’s krausen? German for “curly,” krausen describes the foam that develops on the beer’s surface during fermentation from yeast. Krausen generally indicates the beginning and end of fermentation.
Usually, high krausen is right at the beginning of fermentation and should never be used as an indicator that it is time to rack the bottles or kegs. If you rack too soon, you end up with beer that is too carbonated, glutted on sediment, and a host of other issues. Be patient and give your homebrewed beer some time to settle down, to mature.
18. Overloading The Flavors
Ah, the flavor mixes and fusions. The possibilities are endless when you have an unlimited supply of herbs and spices. Overdo it, though, and you will find yourself scouring homebrew troubleshooting guides for what went wrong. See, everything that goes into making a homebrewed batch of beer is about finding balance.
The flavor profile of your beer is no different. Beer isn’t a stew that could use just another pinch of garlic. No, you need to master basic seasonings and blends first. After you have some experience brewing up decent beer, you can attempt more wild flavor pairings.

19. Beginning The Siphon With Your Gob
Can we talk about how much bacteria is in a human’s mouth at any given moment? About 500 to 1,000 kinds of bacteria dwell in a person’s mouth. And more than 6 billion bacteria can inhabit your mouth. Yeah, so, while your mouth is the perfect receptacle for delicious beer, it should be nowhere near the batch you are currently homebrewing.
You may be tempted to suck on the siphon to get it flowing, but that only serves to dump bacteria in your beer, where it will flourish. Hello, skunk-scented beer. Keep things sanitary by using an auto-siphon pump instead.
Need another reason not to start a siphon with your mouth? You avoid oxidation.
20. Missing Out on Priming Sugar
Those who prefer bottling their beer instead of putting an entire batch in a keg will have to use priming sugar.
Priming sugar is a sugar that goes into beer and other similar beverages with the purpose of providing a fizz, or carbonation. The sugar may also add some aroma and flavor to the beer. Basically, priming sugar is dessert for the yeast to snack on. Imagine what would happen if you skipped the sugar or used too little. You would end up with a flat, sugary beer.
There are online calculators that can help you decide how much priming sugar you need. Or, you can purchase priming sugar tablets to take out the guesswork.
21. Not Following Instructions and Getting In Over Your Head
Most inexperienced homebrewers will solemnly nod their heads in agreement on this one. You do all the work, you think you have the specifics down pat, and then you taste your concoction and it is horrible. Now, you’re here, looking at homebrew troubleshooting for assistance to see what happened.
Precision is something gained from accrued experience. Your first batch is never going to be great. Passable, maybe. But it will take time. That said, beginners usually struggle with making precise measurements. This is often due to impatience, skipping steps, taking shortcuts, or having your expectations set too high.
Regardless of the beer you are brewing, you should be paying close attention to the measurements. Even the slightest mistake in ingredients could result in foul tasting beer. For example, too much sugar will cause over-carbonation.
22. Two Words: Temperature Control
You may have noticed throughout this list that temperature plays a role in the fermentation of beer. Quality temperature control is integral to high quality brews. A common mistake is forgetting just how vital the temperature is and leaving it unattended.
Fermentation elevates the temperature of beer. Too much heat will spike the alcohol content and make the brew sweet. That is why no experienced homebrewer is without a thermometer. You will notice that yeast packets always state the ideal temperature range, as well.
Practice Makes Perfect
It’s all about trial and error when you first begin, but there are a myriad of ways to eliminate the errors. Having a handy homebrew troubleshooting guide is the first step. After that, you just need a little patience and keep the best ingredients on hand. You may make mistakes, but every mistake will be a lesson. Soon, you will be able to make delicious beer with your eyes closed.
Recommended Reading
How Much Does a Beer Keg Cost?
It depends on the size and what the keg is holding. Some kegs may only be around $50, while others are going to set you back by $150-$200.
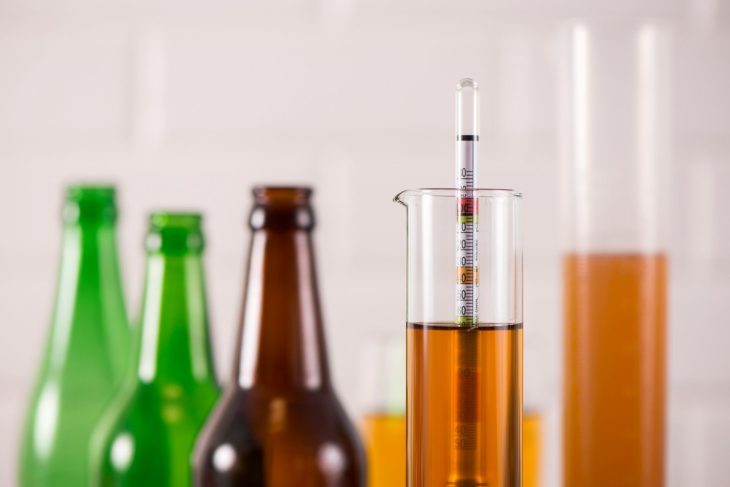
How to Use and Read a Hydrometer
Knowing how to read a hydrometer will come in handy. This guide will help you master the art of using a hydrometer when brewing up beer, mead, wine, or something else.
How Much Does It Cost to Start a Brewery?
How much does starting a brewery cost? Anywhere between $100,000 to a couple million. The total you come up with for your personal business plan may be an eye-popping amount.
Home Brew Beer Ingredients List
There is a lot that goes into beer, but the main ingredients are your hops, grains, water, and yeast. Without that, you wouldn’t get the heavenly delight we call beer.
Noble Hops – Everything You Need to Know
What makes noble hops so special? How do you know which kind to use? Here is everything you need to know about noble hops and how to use them.
Ultimate List of Hop Varieties for Homebrewing
147 known hop varieties. That’s a lot of potentials to play around with and discover tons of flavor combinations for your home brewed delight.
