Hey there! This site is reader-supported and we earn commissions if you purchase products from retailers after clicking on a link from our site.
If you are a home brewer of beer, you have probably heard the term yeast starter passed around the internet forums, pubs, and anywhere else you discuss beer things. You also know that healthy yeast is the cornerstone of a delicious beer. So, now you are wondering if a yeast starter is necessary for your next batch of beer. Making a yeast starter is actually highly recommended, because it will improve the quality and consistency of your homebrewed beer.
A yeast starter, if you didn’t know already, is a tiny batch of beer with a low specific gravity that you use to propagate the yeast for your brew by letting the yeast feed on nutrients until there is enough to ferment a batch of beer. The other purpose is to acclimate yeast to the environment where it will be fermenting. You can make a top quality yeast starter easily—and we’re going to tell you how.
Should You Make a Yeast Starter?
Getting the right amount of yeast into your homebrew will change things—and that’s the main reason people use yeast starters. You can’t trust the amount of yeast in a commercial packet. Each dry yeast or liquid yeast pack has about 100 billion cells, but that could be less, depending on the age of the yeast. And you will need even more yeast to eat up all the sugar in sweeter, maltier brews. So you want to ensure that your brew is getting the maximum amount of yeast needed to ferment.
Benefits of a Yeast Starter
1. Having a starter means two things: you get a faster start to fermentation—and a quicker result. Also, Your beer benefits from this speed. It will taste cleaner and have fewer byproducts, like phenols and esters, from the yeast feasting on sugar.
2. Using fresher yeast means you get a drier beer with better attenuation and a reduced risk of a stuck fermentation.
3. You save money and time. Any brew that has a specific gravity above 1.060 is going to need at least two packets of yeast without a starter. 1.080 is pushing around 3 packets per batch. By using a yeast starter, you cut down on the amount of money you have to spend on yeast packets.
When to Make a Yeast Starter
Many mainstream brewing yeast manufacturers will claim that the packets of yeast they provide have enough cells for a 5-gallon batch of beer. This is true on one condition: If your ale is less than 1.048 specific gravity. A yeast starter is a necessity when you are making a lager or when the ale you’re making is more than 1.048 specific gravity.
What is Pitch Rate?
The pitch rate is defined by Wyeast Laboratories as “the amount of yeast that is added to cooled wort. Pitch rate is generally referred to in cells per milliliter.” Simply put, the pitch rate is the amount of yeast you are putting into wort for fermentation. This will vary based on the wort you have concocted, which is partially based on the kind of ale or lager you’re brewing up.
Note: Since calculating the pitching rate does require some mathematics, you can either use the formula written below or you can visit an online yeast starter calculator to get your information.
A pitch rate is usually written as the number of cells in a single milliliter or liters per degree Plato (mL/°P or L/°P). A degree Plato is equal to 4 gravity points. So, here’s an example: A beer recipe calls for a pitching rate of 1 million yeast cells mL/°P or 1 billion cells L/°P. The specific gravity of that wort will be 1.040, also written as 10°P.
Since the average batch calls for 5 gallons (19L), you can figure out how much yeast you need by applying the specific gravity of 1.040 and the L/°P pitch rate described above. It looks like this:
1 billion cells L/°P x 19L = 19 billion cells
19 billion cells x 10°P = 190 billion cells
This means you will need 190 billion cells to ferment 5 gallons of wort with a specific gravity of 1.040.
We also put together this nifty pitch rate chart for you:
| Beer Style | Specific Gravity | Pitching Temp | Million Cells |
| Ale | < 1.060 (15°P) | > 65°F (18°C) | 6 mL |
| Ale | 1.061 – 1.076 (15-19°P) | > 65°F (18°C) | 12 mL |
| Ale | > 1.076 (19°P) | >65°F (18°C) | > 18 mL |
| Lager | < 1.060 (15°P) | >65°F (18°C) → < 60 °F (15°C) | 6 mL |
| Lager | 1.061 – 1.076 (15-19°P) | > 65°F (18°C) → < 60°F (15°C) | 12 mL |
| Lager | > 1.076 (19°P) | > 65°F (18°C) → < 60°F (15°C) | > 18 mL |
| Lager | < 1.060 (15°P) | < 60°F (15°C) | 12 mL |
| Lager | 1.061 – 1.076 (15-19°P) | < 60°F (15°C) | 18 mL |
| Lager | > 1.076 (19°P) | < 60°F (15°C) | > 24 mL |
For the middlemost three, there is a technique where you pitch the larger wort while it is warm, allowing for some of the fermentation to start, and then you cool to the appropriate fermentation temperature.
How Does Pitch Rate Affect Homebrewing?
The amount of yeast you use is important. We’ll say it again and again. Nailing the pitch rate is even more essential with certain beer types, like Belgian beers, lagers, and Hefeweizen.
A low pitch rate can:
- Increase amount of diacetyl acid
- Increase amount of alcohol
- Lead to high final gravities
- Increase esters
- Increase risk of bacteria and infection
- Raise amount of sulfur
- Cause stuck fermentation
High pitch rates will:
- Decrease overall esters
- Cause a thin mouthfeel or body
- Cause autolysis
- Make beer ferment too quickly
In other words, you need to find the appropriate amount each time. Otherwise, you end up with poor quality beer.
How Much of a Starter Do You Need?
So, now that we understand why a yeast starter is important, the benefits, and what too little or too much yeast can do to your homebrew, it’s time to talk about how you calculate the yeast starter size that you need for batch of beer. While you can use the same arithmetic for the pitch rate that we described above, there is something you need to consider before doing that.
You need to remember that yeast is alive, and so it is going to grow. Most people will declare that a 1 liter (26 gallon) yeast starter is the best when you are making it with liquid yeast. However, that’s not always correct. Depending on the beer you are making and your goals, you will sometimes need a much larger yeast starter, assuming the liquid yeast you’re using has about 100 billion cells.
Brewing a beer with high gravity? You’re definitely going to need more yeast than that.
Also, you need to consider the growth rate of the yeast. A single packet of liquid yeast contains anywhere from 60-120 billion cells. If you put that in a 1L starter, it will double the yeast in about 24-48 hours. But if you use a 2L starter, you get 2.5 times more cells in the same amount of time. Use a 3L starter, and the number of cells triples.
So, don’t overlook how much yeast you’re going to need for your beer.
How to Aerate Your Yeast Starter
One of the most overlooked elements to crafting a great yeast starter is giving the wort oxygen. Since yeast needs oxygen for propagation, you have to do this. Give your yeast starter about 12-24 hours of aeration before you use it for homebrewing.
There are a couple of ways to go about aerating your starter:
Rousing vs. Stir Plates
For those homebrewers who wish to do this as cheaply as possible, you have the intermittent shaking, or rousing, route. All you have to do is shake the starter jar or flask whenever you pass by to introduce more oxygen. Or you can set a timer and give the jar a shake every few hours.
Rousing requires no expertise and no calculation. Simply shake up your yeast. The quality of your beer will definitely improve.
However, if you want the best results, a stir plate is how you go about it.
The Stir Plate
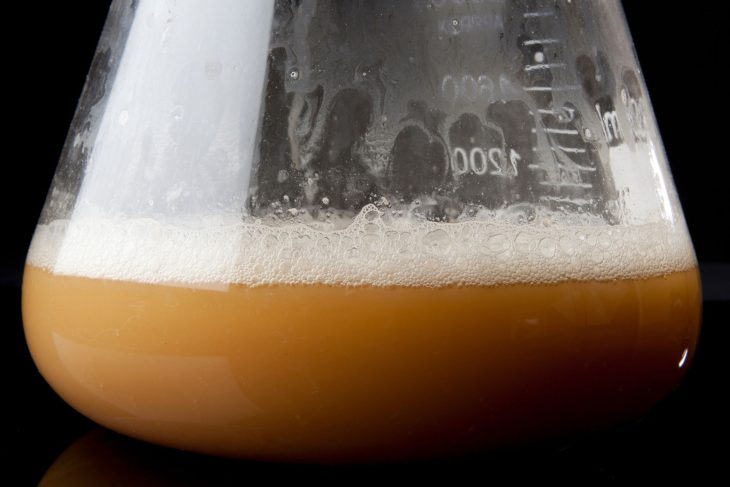
A stir plate sounds like some kind of crazy contraption, but all it is is a flask stand that has an internal spinning magnet. You put a sanitized stirring bar inside an Erlenmeyer flask then let the spinning magnet inside the plate make the bar spin. A vortex is created that continuously stirs the solution—or in our case, wort—and introduces oxygen.
Obviously, something that takes the labor out of rousing your homebrew yeast starter is going to come in handy. But a yeast starter stir plate works twice as good as intermittent shaking.
How? The stir plate suspends the yeast in a constantly moving and oxygenated environment. Meanwhile, any waste products, like carbon dioxide, are whisked away. The vortex also prevents yeast from flocculating, or gathering together in a clump and sinking to the bottom.
How and When to Pitch a Yeast Starter
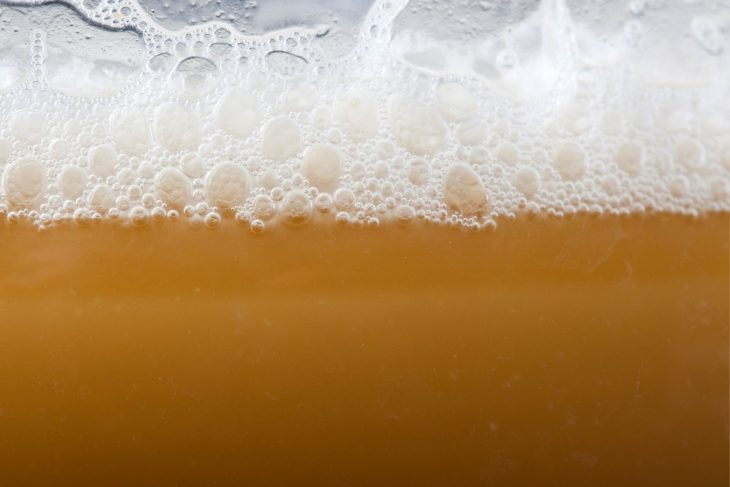
The time has come to talk about the actual pitching. After you put the yeast into the starter wort, you have to wait between 24-48 hours before it is usable. The yeast has to propagate. You will notice that the yeast is ready when you see that the beer is beginning to clarify, there is a layer of white on the bottom of your flask or jar, and the krausen has dropped.
But if you really want to play chemist and get undeniable proof the yeast starter is ready, use a refractometer or a hydrometer.
One thing we do recommend is “cold pitching.” Yeast is adaptable, but it can also be sensitive when put into an environment it’s not used to. If you try putting a warm yeast starter in cooled wort, the yeast will be shocked into a slower fermentation. So, the best practice for when to pitch is to store the starter in the refrigerator prior to use then pour it straight into the cooled wort.
If your starter is ready to go, you now have two choices: to decant the starter or pour the whole yeast starter into your homebrew.
Decanting vs. Adding The Whole Shebang
Usually, when the yeast is ready to be pitched, you pour the whole starter straight into the wort. There is zero impact to the final product if you do this.
But if you are planning on making a light-bodied beer or have a larger than average starter, you have a second option. You can also do this route if you’re concerned about the starter affecting the original gravity or the flavor. Decanting helps you avoid any issues by pouring the starter into another container before the pitch.
Decanting is simple. Once the yeast has finished fermenting, put the container into the fridge and let it settle overnight. When you’re ready to use the starter, pour most of the wort off then use the dregs of the yeast and wort at the bottom of the jar.
How to Use a Liquid Yeast Packet for Yeast Starter
You have your yeast. You know how to use it. Now, it’s time to put your newfound knowledge into practice.
To make a yeast starter gather the following:
- 1 packet of liquid yeast
- Fermaid
- Dry malt extract (DME)
- Foil or foam stopper (never use an airlock or bung)
- Funnel
- Erlenmeyer flask, one that is large enough for your starter and headspace. For instance, a 4L flask is ideal for making a 2L starter.
- 4 quart saucepan
- Flash weight (optional)
- Stir plate and stir bar (optional)
Making the Packaged Yeast Starter
First and foremost, make sure you have cleaned and sanitized every piece of equipment you have.
To begin making your starter, get 2 cups (200 g) of DME and add it to 2L (0.53 gal) of water in your 4 quart saucepan. If you are using a gas burner or stovetop, you can boil the starter in your flask. The only risk here is boilover, which is why the saucepan with headspace is recommended. Never boil your flask on an electric burner or stove.
Boil the water for 10 minutes. Stir once in a while.
If you are using another container for boiling wort, sanitize and clean the flask. To get the flask really clean, you can even place it in the oven with a piece of foil over the mouth at 250°F (121°C) for 60 minutes. Make sure you complete this task well before you boil the wort so that the flask has time to cool. The wort boils for 10 minutes.
Put the lid on the pot during the last minutes to sanitize the lid. Again, be cautious of boilover.
Once the boil is complete, add 4.8g (1/8 teaspoon) of yeast nutrient (Fermaid) to the mix.
Place your flask in the sink. Put a funnel into the mouth then pour the hot wort slowly into the flask. If you’re using a stir bar, add it now.
Put on an oven mitt to protect your hands for this next step. Immerse the flask in a cold water bath and cover the mouth with a piece of foil. If you have a weight, use it now to keep the flask submerged. While the flask in the cold water bath, gently swirl it around so that the wort cools more quickly. You want to bring it down to around 65°F-75°F (18°C-24°C).
Now that the wort is cooled, pour in the yeast packet. Swirl again until everything is mixed together.
If you are NOT using a stir plate, you will now rouse the yeast. Make sure you have the flask covered tightly before giving it a vigorous, minute-long shake. For the next few days, give the flask a shake periodically. Be gentle, since the starter might foam up and escape the flask once fermentation has begun.
If you ARE using a stir plate, put the flask on the plate. Make sure the flask is tightly sealed. Place the stir plate somewhere that is out of direct sunlight and on a safe surface. Monitor the temperature and keep it at a steady 70°F-75°F (20°C-24°C).
After 24-48 hours have passed, your yeast starter will be ready to pitch.
How to Make a Yeast Starter from Bottle Conditioned Craft Beer
Let’s say you have made up a delicious homebrew already and have some in a bottle. You don’t have to go shopping for any more yeast.
With this method, the starter size is going to be smaller than what you get from packaged yeast. You also should only go this route if the specific gravity of the wort is low, about 1.020, since higher gravity wort will overwork the yeast cells.
The equipment list is relatively the same. Swap out the package of liquid yeast and replace it with 2-3 cans of unfiltered craft beer or bottle-conditioned beer.
Making Your Bottled or Canned Beer Yeast Starter
As always, clean and sanitize everything you are going to be using for this process. You might even want to wipe out the sink for the wort ice bath before filling it. Once you’ve done this essential first step, prepare the ice bath.
Next, make your starter. Add 1 tsp (20 g) of DME to 2 cups (473 mL) of water in a 4 quart saucepan or pot. Swirl everything together. The starting gravity should be at 1.020 or somewhere close.
Stir frequently while boiling for 10 minutes.
If you are using another container for boiling wort, sanitize and clean the flask. To get the flask really clean, you can even place it in the oven with a piece of foil over the mouth at 250°F (121°C) for 60 minutes. Make sure you complete this task well before you boil the wort so that the flask has time to cool. The wort boils for 10 minutes.
Put the lid on the pot during the last minutes to sanitize the lid. Again, be cautious of boilover.
After you’ve boiled the mixture, add 1/8 teaspoon (4.8 g) of Fermaid.
Place your flask in the sink. Put a funnel into the mouth then pour the hot wort slowly into the flask. If you’re using a stir bar, add it now.
Put on an oven mitt to protect your hands for this next step. Immerse the flask in a cold water bath and cover the mouth with a piece of foil. If you have a weight, use it now to keep the flask submerged. While the flask in the cold water bath, gently swirl it around so that the wort cools more quickly. You want to bring it down to around 65°F-75°F (18°C-24°C).
During this cooling period, take the bottles of beer and sanitize the tops. Cover the tops with a sanitized foil. After the wort is cool, remove the foil from the bottles and swirl them. You should get a slurry. Carefully decant the yeast from the bottles or cans, pouring directly into the wort.
Using a stir plate? Put your flask on and start up the plate. Keep the mixture out of sunlight and maintain a temperature range of 70°F-75°F (20°C-24°C). After 12-18 hours have passed, switch off the stir plate. Let the yeast propagate before pitching it. Within 24-48 hours, the yeast will settle and propagation is finished.
Not using a stir plate? After decanting, shake the flask for about a minute. Throughout the next 12-18 hours, you should give the flask a shake once in a while. Don’t be too rough with the swirling, since that could cause foam-over. After 12-18 hours have elapsed, leave the starter alone.
Since you will have made a smaller starter from bottle-conditioned beer, you might need to make a second starter following the same method before you can brew.
Aim to get the specific gravity of the second batch around 1.030-1.040. Follow the same instructions as with the first batch.
Wrapping Up
So there you have it—everything you need to know about making a yeast starter. It’s not too complicated, right? With a quality yeast starter, fermentation happens quicker, and you reach your desired final gravity much more easily. All you need is some patience, the right items, and a bit of arithmetic. You’ll be crafting awesome yeast starters (and delicious beer) in no time!
FAQ on Yeast Starters
If you are using a dry yeast strain, no, you don’t need a starter. Dry yeast is often sold with higher cell counts than a liquid variety. Instead of making a yeast starter, rehydrate the dried yeast with some sterilized water then pitch it into the beer.
Yes, you can. However, you can just as easily pitch a couple packets of dry yeast and never have to worry about making a yeast starter.
It is best to decant your yeast starter before pitching it into the wort. Otherwise, the yeast starter becomes part of the brew. Since there is oxygen in your yeast starter, you don’t want to add the whole thing, because your beer will be stale before you even get to drink it.
No, do not use an airlock. It’s important that your yeast starter gets enough air. If you are worried about debris, bugs, or other floating contaminants getting into the solution, you can cover the yeast starter with some sanitized tin foil. If there are bugs flying around, consider purchasing a foam stopper. You can boil water in a flask while the stopper is in it to sanitize or wash the stopper in StarSan.
Yes, you can. It’s the same process as with any other yeast starter set up. You simply scale the recipe you are following to make the appropriate amount of wort.
Recommended Reading
Home Brew Beer Ingredients List
There is a lot that goes into beer, but the main ingredients are your hops, grains, water, and yeast. Without that, you wouldn’t get the heavenly delight we call beer.
All-Grain vs. Extract Brewing: Equipment and Process Differences
If you’re taking up homebrewing and are confused about the differences between all-grain brewing vs extract brewing, we’ve got you covered.
Controlling Mash Temperature – An Essential How-To Guide
The best beer begins with the best mash; to get it, controlling mash temperature is key. Understand how temperature changes the very nature of the wort and control it!
Does Moonshine Go Bad? What You Need to Know
Did you finally pull that gifted homemade moonshine from last year out from the back of the refrigerator? You may be wondering, “Does moonshine go bad? Is this fit to drink?”
Inventing Beer Recipes – A Guide to Designing Homebrew
If you want to know about inventing beer recipes, you are in the right place. Today, you are going to get the inspiration you need, as well as a step-by-step guide to help you along the way!
Sweet Beers: Your Ultimate Guide to Drinking and Brewing Sweet Beers
If you are looking for more information on sweet beers, this Ultimate Guide to Sweet Beer will tell you everything you need to know and more.