Hey there! This site is reader-supported and we earn commissions if you purchase products from retailers after clicking on a link from our site.
Interested in milling grain for beer? If you plan to homebrew, learning as much as you can about this process is vital. Crushing malt can alter the flavor, color, and general essence of your beer. As such, doing it well can cause your beer-making skills to soar to new heights. So, if you’re ready, let’s dive into the details on how to make your next crushed malt shine.
Table of Contents
- Why Crush My Own Malt to Begin With?
- Does Malt Need to be Milled?
- Crushing Malts: Why the Ideal Crush Is Important
- Do You Need to Mill Grain For Beer?
- What Is the Milling Process in Beer Making: How to Crush Grains
- How Long Is Milled Grain Good For Brewing?
- Best Homebrew Grain Mill
- Can I Use Other Home Appliances to Crush Malt?
- How to Crush Your Own Malts: It’s Not as Hard as You Think!
- FAQ
Why Crush My Own Malt to Begin With?
You may be wondering why you would even set out to crush your own malts in the first place. After all, aren’t there pre-crushed malts out there you can buy?
Actually, there are, and plenty of them. Not only that, but your local homebrew supply shop may even crush your malt for you.
But crushing your own malt has its benefits as well. Consider the following reasons to crush your own malt at home:
Cost
Crushing your own malt will save you money. Your local homebrew shop will likely charge a fee to crush your malt for you. Thus, you can skip the fees by doing the hard work yourself at home.
Sizing
Controlling your own grain size means a lot when it comes to using certain types of homebrew equipment. Crush your own grains to be able to control grain sizing yourself.
Spontaneity
By purchasing your grains whole, you can brew up something fresh whenever you feel like it. Unmilled grains also keep for much longer than grains that have already been milled.
Does Malt Need to be Milled?
Yes, malt needs to be milled.
Milled grains yield both color and exceptional flavor to wort. Both are important when crafting amazing homebrew. As you may already know, malt types vary and can impart excitement and diversity to craft beer depending on which you use. This is important to know when trying to achieve certain flavors to please your palate.
All-Grain Brewing vs Extract Brewing: How Does It Relate to Crushing?
We won’t be going over all of the finely tuned details concerning all-grain vs extract brewing here, but know that differences between the two matter when using milled grain.
In short, all-grain brewing depends heavily on the crush. This is because it requires fermentation. This is when the milling grains convert enzymes into starches making for fermentable sugars to produce the alcohol for the final product. Improperly crushing this type of malt will hinder this process, making for less-than-desirable brews.
Extract brewing, however, is different in that you’re only using dry malt extract. To this you can add your own specialty grains for beer which can add their own special something to the mix. But because you aren’t using these malts specifically for the fermenting process, brews made with extract brewing are less focused on malt crush.
Crushing Malts: Why the Ideal Crush Is Important
When milling your own grains, the task requires skill and patience. Milling grain the right way has implications for the final beer yield, so doing it right is important.
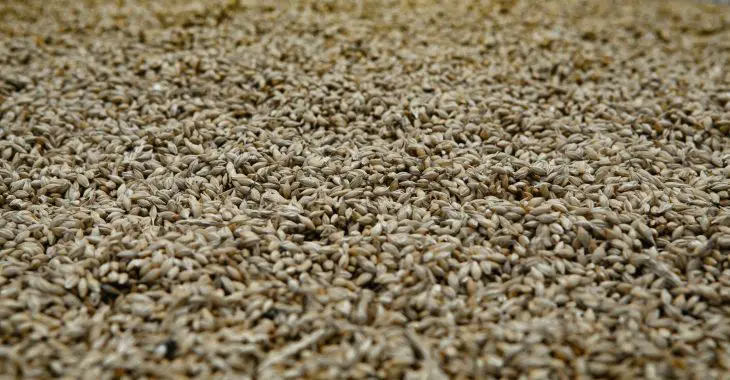
Barley grain is made up of two major parts: the husk and the kernel. To crush grains properly, you’ll want intact husks–that are broken– and crushed kernels (also known as grist). If the husk is broken but intact, it makes it easier for water to pass through. When the kernels are properly crushed, it makes it possible for more enzymes to activate which yields more starches for sugar. The more fermentable sugars that are readily available, the better your yield.
Having said that, there is such a thing as too much of a fine crush when it comes to the grist. Though finely crushed kernels produce a better yield, they may also thwart your wort flow during the mashing process. This may result in grain beds that drink up water but don’t release wort as desired.
Note: If you plan to pulverize grains into flour, you need to be really careful. Use a mesh grain bag to hold your grain to avoid stuck sparges. If you pulverize the entire grain into flour, it may hinder your mashing efficiency as it turns into a thick pasty liquid that isn’t beneficial for mashing.

Do You Need to Mill Grain For Beer?
As you can see, you absolutely do need to mill grain for beer. Whatever you do, never skip the process of milling your own grain for beer. It is important to crush grain to activate the enzymes within them. This releases the starches needed to convert them to sugar. Thus, the milling of your own malts is imperative and something that shouldn’t be skipped!
If all of this sounds like a major headache, don’t worry. Very soon we’ll be going over the process for milling grains and how you can do so easily and effectively for the ultimate beer yield.
What Is the Milling Process in Beer Making: How to Crush Grains
Now that you know the importance of grain milling, it is time to focus your attention on the various methods you can use for crushing grains. The main techniques for milling grains include using a rolling pin, roller mill, electric drill, or grain mill.
Let’s take a deeper look at each.
Rolling Pin
If your normal grain mill breaks and you need to use something to crush your grains quickly, a rolling pin can do the trick. Not only can a rolling pin be used if your regular grain mill is out of order, but also for any time you need a quick, simple, and budget-friendly way to crush grains.
All you need to crush your grains with a rolling pin is a Ziploc bag, your grains, and of course, your rolling pin. When selecting the type of rolling pin to use, be sure to get one that’s heavy-duty. You can purchase one made of hardened steel or you may use one made of marble. Using a normal wooden rolling pin is also okay, as long as you are aware that the grains may produce tiny dents in it.
(Yes, grains are really that hard!)
To crush your grains using a rolling pin, simply place your grains in your plastic bag, lay it flat on a stable table or milling area, and begin rolling away. Just really be sure to use elbow grease when milling your grains to ensure they crush properly.
Note: Using a rolling pin is also a great method for crushing specialty grains. Since specialty grains are steeped with wort and aren’t handled the same way as fermentables, crushing them with a rolling pin is a quick, easy, and affordable option.

Roller Mill
A roller mill is an awesome tool to achieve the perfect balance when crushing both the grist and husk. As you’ll recall, the husk should remain intact with the kernel, however, the kernel should be thoroughly crushed for enzymatic action to take place. With mill rollers, you can achieve this balance with minimal effort.
A roller mill works by churning the grains through two or three cylinders. The husk stays attached and the kernels are broken into pieces. This kind of crush can yield delicious beer! Roller mills come in varying sizes. You can purchase a two roller mill or three roller mills.
A local homebrew grain mill or local homebrew club may have one you can use or they may offer to do it for you themselves. And because roller mills can be pricey, it’s worth it to explore these alternate options.
Grain Mill
A grain mill is an optimal choice for all-grain brewing, especially if you aren’t trying to brew in a bag mash format. Grain mills, also referred to as flour mills, aren’t going to completely pulverize your grains.
Pulverization often happens when you are using devices such as coffee grinders and food processors to mill your grains. These often turn husks into shreds which isn’t ideal for typical brewing.
Still, many that have used their own grain mill experience shredded husks that incorporate with the rest of the crushed kernel grain, which can cause dreaded stuck sparges to occur. In order to remediate this, it may be best to buy extra malt and use it when using your own mill at home. By purchasing and milling extra malt, you may experience a better outcome as more starch will present itself for fermentation when using this method.
Power Drill
Uh-huh, you read that correctly. You can actually use a power drill to crush your grains, and guess what? It can make the process a lot easier! Not only that, but milling grains with a power drill can lead to more consistent results. When using an electric drill to mill grains aim for a ⅜” or ½” chuck for best results.
Alternatively, you can use a hand crank to churn up crushed malt. This may take a little more arm action but just think of it as an unintended workout.
Buying Grain
When buying and storing grains, it makes sense to buy in bulk if you plan to utilize the malt for a long period of time. As always, make sure that you keep the unmilled grains stored properly in a cool, dry place. If it’s brew day and you are brewing in large batches, simply measure the desired amount of unmilled grain, then use the method of your choosing to crush your malt.
If, however, you tend to mill in small quantities, you won’t need to buy bags in bulk. But obviously, how much malt you buy–whether roasted, base malt, or specialty–is totally up to you.
How Long Is Milled Grain Good For Brewing?
After having read all the ways you can crush your malt for brewing, you may wonder how long your milled grains are good for. The quick answer to this is 6 months. Still, there are factors you’ll want to keep in mind when trying to keep your grains as fresh as possible.
Most homebrewers know that the environment in which you store your milled grains is very important. The following factors will play a major role in how long your milled grains will actually last:
- Moisture: Keeping your milled grains (and other grains) in an area where there is a lot of moisture is just asking for trouble. Doing so increases the likelihood of your grains getting wet and growing mold. Know that your grains don’t have to be directly immersed in water to become affected. Even humid environments can cause moisture to form on your grains, and thus have moldy outcomes.
- Heat: As mentioned, humid environments provide a breeding ground for mold to grow. The same is true of hot environments. Hot environments may cause your specialty grains and base malts to become affected by bacteria and mildew. Once this happens, your hard work and money have gone to waste. You’ll need to toss the moldy milled grains out and start with fresh grains. Bummer!
- Pests: Weevils and other rodents can litter your freshly milled grains causing them to become unusable. Sure, some people may view weevils and other rodents as harmless, but we certainly don’t. Keep your grains protected from invading critters by storing them in a tightly sealed container or package and away from areas like your garage or attic where pests may be lurking.
Best Homebrew Grain Mill
Though there are a copious amount of grain mills on the market, you may be wondering which might be a good one to start with. If you’re not opposed to using a roller mill, we’d recommend you try the Barley Crusher.
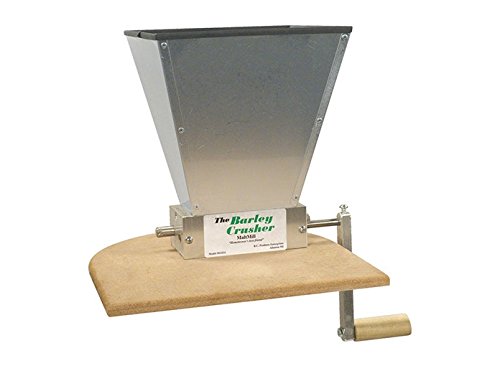
This humble machine is a 2-roller mill whose gap gauge allows for variation to meet most, if not all home brewing needs. This gap can be set between 0.015” to 0.070” meaning you can adjust the gap depending on the need. To make things even more enticing, the Barley Crusher can be easily and securely placed on a 5-6 gallon bucket.
All in all, this is a versatile, trusted, tried-and-true grain mill we gladly recommend for those interested in joining the ever-growing homebrew club!
Other Great Grain Mill Options
Want other options? Check out the following other great buys for roller grain mills.
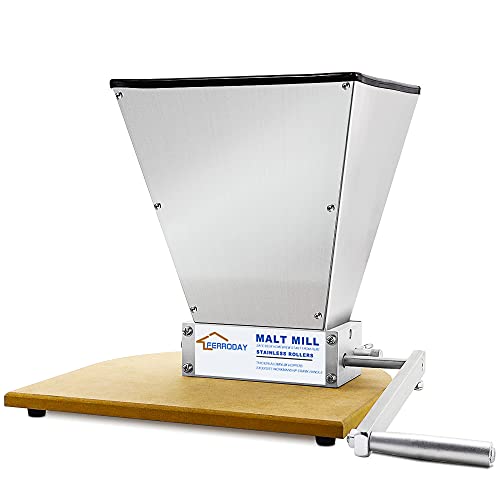
FERRODAY Malted Grain Mill Malt 2 Roller Stainless Steel Malt Crusher
The FERRODAY malted grain mill is a 2 roller mill with a 7lb hopper, perfect for homebrewers wanting to crush larger batches at once. This grain mill forces grain through two 5-inch rollers and keeps the malt husks perfectly intact for the perfect brew. You can also attach an electric drill with no need for an additional attachment if you wish to give your arm a rest. It also comes with a solid wooden base that easily fits 5-gallon fermenting buckets.
Homebrewers Outpost – MILL710 MaltMuncher 3 Roller Grain Mill
Looking for a milling option with 3 rollers instead of two? Try the Malt Mucher 3 on for size. It tends to be a bit cheaper than similar brands on the market, but the grain crush on this one is perfect. It features a 12lb hopper, manual 12mm crankshaft, and works to crush about 8lbs per minute. Pretty awesome pick for your next milled malt if you ask us.

Can I Use Other Home Appliances to Crush Malt?
People often wonder if other household appliances, such as coffee grinders or blenders, work well for crushing malts. After all, why buy a separate grain-crushing device if you don’t have to, right? Let’s dig deeper into this question to find out.
Can I Use a Coffee Grinder or Blender to Crush My Own Malt?
While it’s possible that you could use a coffee grinder to crush your malt, it may not be the best practice. Remember that when crushing your malt, the idea is to keep the husks intact while effectively crushing the kernel. By passing the grains in a coffee grinder, you run the risk of detaching the husk from the kernel. You may even shred the husks completely. At this point, your husks and kernels will be intermingled yet detached from one another. And this, friends, is what we want to avoid.
So, what’s the verdict? You could try using a coffee grinder or blender to crush your malt, but it may produce less than stellar results. Because you may not be able to adjust your grinder or blender you may end up with inconsistent grain size. Still, some have used this method and have found it to work just fine.
If you’re feeling risky, go ahead and give it a try. Let us know how it turns out!
How to Crush Your Own Malts: It’s Not as Hard as You Think!
Milling grains for beer are imperative for improving the taste and overall beer yield for your final product. To maximize mash efficiency, it is important to get the proper crush. This may involve using more grain when using devices like grain mills, or it may require a bit more elbow grease if you plan to go with a rolling pin alone.
Either way, the whole process of developing a coarse crush on your grains is relatively easy to achieve using any of the tools we’ve mentioned in this post. Feel free to experiment with different grains to achieve the desired result.
FAQ
Yes, you should clean your grain mill after each use. Cleaning is important for the optimal function of your mill. It is especially important to clear your machine of any leftover grain dust, husks, and derbies. This is often most easily done with compressed air machines. For specific instructions on how to clean your specific mill, refer to the manual that came with your mill.
You can try using a food processor to crush grains, but any blade-style appliance may not be the best pick for keeping husks intact for brewing purposes.
Recommended Reading
The Best Mini Kegerators For Your Homebrew
Mini kegerators are convenient, portable, and most of all, very easy to use. You should at least now know what to look for when shopping around for a portable keg dispenser for yourself or a beer-loving buddy.
Inventing Beer Recipes – A Guide to Designing Homebrew
If you want to know about inventing beer recipes, you are in the right place. Today, you are going to get the inspiration you need, as well as a step-by-step guide to help you along the way!
Using Cane Sugar vs Corn Sugar For Homebrewing Beer
Cane sugar vs corn sugar, which one is best for homebrewing beer? Either one is fine since both ferment fully; the only difference is in dextrose and sucrose's chemical makeup.
The 20 Best Magazines and Websites on Home Brewing
Prefer the feel of a magazine in your hands? Then you are going to love these craft beer and homebrewing magazines. Here are our favorites. Happy reading!
Dry Hopping Your Beer Like a Pro
The concept around dry hopping is very basic. You grab some hops and toss them into the fermenter. Then, you wait a few days for those hops to infuse their aroma and flavor into the beer.
How and Why to do First Wort Hopping
Does trying out new brewing techniques make you nervous? Don’t worry. That happens to be the first reason you should give first wort hopping,
