
Brewing clean, professional-quality lagers at room temperature sounds impossible, right? That’s where pressure fermentation changes everything. This technique lets you ferment beer under controlled pressure using a spunding valve, suppressing off-flavors while naturally carbonating your brew. The result? Crystal-clear lagers in half the time without expensive temperature control equipment. Pressure fermentation has revolutionized homebrewing by giving brewers the flexibility to create commercial-quality beer in any climate. From faster timelines to reduced oxidation, this method delivers cleaner flavors and better consistency. Ready to discover how pressure fermentation can transform your brewing and unlock new possibilities in your fermentation process?
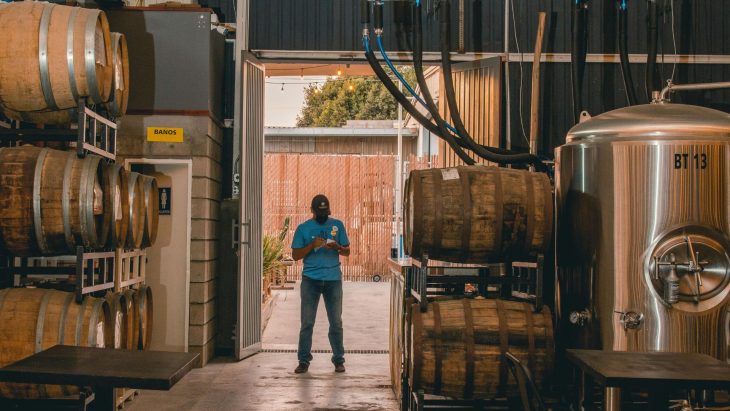
Introduction to Pressure Fermentation
Picture this: you’re brewing a lager in the middle of summer, and your basement’s hovering around 75°F. Normally, that’d spell disaster—off-flavors galore. But what if I told you there’s a way to ferment clean, crisp beer at those warmer temps? Enter pressure fermentation.
At its core, pressure fermentation is exactly what it sounds like—fermenting your beer under pressure instead of letting CO₂ escape freely through an airlock. Instead of the typical atmospheric pressure (0 PSI), you’re keeping things sealed up with a spunding valve that maintains anywhere from 10-15 PSI inside your fermenter.
The magic happens because of what pressure does to yeast. When CO₂ can’t escape and builds up in your fermenter, it suppresses the production of esters and fusel alcohols—those compounds that give you fruity or solvent-like flavors. The result? Cleaner, crisper beer that tastes more professional.
But here’s the kicker: pressure fermentation isn’t just about ester suppression. It’s about flexibility. You can ferment lagers at ale temperatures, shave days off your timeline, and naturally carbonate your beer all in one go. The CO₂ your yeast produces doesn’t vent off—it dissolves right back into the beer, giving you perfectly carbonated homebrew without cracking open your CO₂ tank.
Related: Conical Fermenters vs Buckets: Which Is Best for Homebrewing?
How Pressure Fermentation Works
When yeast ferments beer, it consumes sugars and produces alcohol and CO₂ as byproducts. In traditional fermentation, the CO₂ escapes through an airlock. But when you trap that CO₂ inside a sealed fermenter, it starts dissolving back into the beer, creating pressure.
The dissolution of CO₂ fundamentally changes yeast metabolism. Under pressure, the enzymes responsible for producing esters and fusel alcohols get suppressed. Your yeast still ferments completely, but it produces fewer flavor-active compounds. The relationship between pressure and CO₂ is straightforward: every PSI of pressure you maintain corresponds to a certain amount of dissolved CO₂, which varies based on temperature. At around 60°F and 10 PSI, you’re looking at roughly 2.5 volumes of CO₂—perfect for most beer styles.
Commercial breweries have been inadvertently doing a version of this for years. A 15-foot tall fermenter creates about 6 PSI of pressure at the bottom just from the weight of the liquid column—that’s hydrostatic pressure.
Different yeast strains react differently to pressure. Lager strains handle 15-20 PSI well and produce incredibly clean profiles even at temperatures that would normally cause off-flavors. Ale yeasts are more sensitive and typically work best in the 8-12 PSI range. For styles where esters are essential—Belgian ales or hefeweizens—you’ll want to skip pressure altogether or apply it only at the tail end of fermentation.
Benefits of Pressure Fermentation
Pressure fermentation brings several advantages to your brewing:
- Cleaner flavor profiles: Reduced ester production means crystal-clear flavors where malt and hops shine through without competition from fruity or funky notes
- Faster fermentation timelines: Warmer fermentation temps speed up yeast activity while pressure keeps off-flavors in check, cutting lager timelines from 6-8 weeks down to 3-4 weeks
- Natural carbonation: CO₂ produced during fermentation dissolves directly into your beer, eliminating the need for force carbonation or priming sugar
- Reduced oxidation risk: A sealed fermenter with a spunding valve creates a closed system that keeps oxygen away from your beer during fermentation and transfers
- Temperature flexibility: Brew lagers at room temperature (68-72°F) without needing refrigeration, or ferment ales in warmer climates without off-flavors
- CO₂ savings: Naturally carbonating your beer means you’re not burning through expensive CO₂ tanks for force carbonation
The natural carbonation gives you finer, more integrated bubbles than force-carbonating sometimes achieves. Plus, the closed system dramatically reduces oxidation—the silent killer that makes beer taste like wet cardboard after a few weeks.
Equipment Needed
You need specific gear for pressure fermentation. Standard plastic buckets or glass carboys won’t handle the pressure safely. You’ll need a pressure-rated vessel like a Fermzilla, Kegmenter, or a standard 5-gallon corny keg. Corny kegs are the most economical option—they’re built to handle 40+ PSI and work perfectly as pressure fermenters.
The spunding valve is your critical piece of equipment. This adjustable pressure relief valve with a gauge controls your fermentation pressure. You set your desired PSI, and when fermentation produces enough CO₂ to exceed that pressure, the valve vents just enough gas to maintain your set point. They cost $30-80 from most homebrew suppliers.
You’ll also want a PSI gauge if your spunding valve doesn’t have one integrated, a blow-off tube for the first 24-48 hours of fermentation, and closed transfer equipment with ball-lock disconnects for oxygen-free transfers from fermenter to keg.
Step-by-Step: How to Pressure Ferment
- Brew and transfer: Complete your brew day as usual—mash, boil, and chill your wort to pitching temperature. Transfer into your pressure-rated fermenter with adequate headspace (leave 0.5-1 gallon for krausen in a 5-gallon batch).
- Pitch yeast and use blow-off: Pitch your yeast as normal. Attach a blow-off tube to your fermenter’s gas post and let it vent into a bucket of sanitizer for the first 24-48 hours. Don’t seal everything up immediately—yeast needs oxygen during the lag phase.
- Apply pressure: Once active fermentation is clearly underway (bubbles through blow-off or gravity has dropped 5-10 points, typically day 2-3), remove the blow-off tube and attach your spunding valve. Set your target PSI: 10-12 PSI for ales, 15-20 PSI for lagers.
- Monitor and maintain: Watch as pressure naturally builds from CO₂ production. Your spunding valve will vent excess gas to maintain your set pressure. The gauge should stabilize and hold steady.
- Temperature control: For ales that normally ferment at 68°F, you can safely push to 72-75°F under pressure. For lagers, room temperature (68-72°F) works well at 15 PSI.
- Finish and transfer: Once you hit final gravity and it’s stable for 48 hours, cold crash if desired, then transfer to a keg or serve directly from the fermenter.
Ideal PSI & Temperature Settings
For ale fermentations, the optimal range is typically 8-12 PSI. This provides enough pressure to suppress unwanted esters and fusel alcohols without eliminating yeast character. Temperature-wise, you can push 3-5°F above your normal fermentation temp. If you’d normally ferment an American ale at 68°F, you can let it ride at 72°F under 10 PSI. Clean-fermenting ale strains like US-05, BRY-97, or California Ale work excellently under pressure, producing crisp, neutral profiles perfect for IPAs and pale ales.
Lager yeasts excel under pressure. At 15-20 PSI, you can ferment lager strains at room temperature (65-72°F) and get results that rival traditional cold-fermented lagers. This means brewing an authentic-tasting pilsner without dedicated refrigeration. The pressure keeps ester production minimal while warmer temps mean fermentation wraps up in a week instead of the traditional month-plus timeline. Strains like Saflager W-34/70 and Diamond Lager yeast handle pressure exceptionally well.
Your PSI setting determines the final carbonation level, and this relationship depends on temperature. At 68°F and 12 PSI, you’ll end up with around 2.5 volumes of CO₂—perfect for most styles. If you cold crash down to 35°F while maintaining 12 PSI, that number increases. Use a carbonation chart to dial this in precisely, or aim for 10-12 PSI at fermentation temp for most beer styles.
Pros & Cons
Pros:
- Cleaner beer with reduced off-flavors
- Faster fermentation timelines (lagers in 3-4 weeks instead of 6-8)
- Natural carbonation saves CO₂ and provides better bubble integration
- Temperature flexibility allows larger brewing without refrigeration
- Reduced oxidation risk keeps beer fresher longer
- Ability to ferment at slightly elevated temperatures without consequences
Cons:
- Strips out essential character in Belgian ales, hefeweizens, and English bitters where esters are desirable
- Equipment costs ($100-300 minimum for pressure fermenter and spunding valve)
- Yeast can get stressed under pressure, especially if under-pitched or old
- Bottling becomes complicated since beer is already carbonated —it requires a counter-pressure bottle filler
- Dry hopping is more challenging and risks foaming geyser
- Not appropriate for every beer style
Pressure fermentation is a valuable tool for lagers, clean ales, and situations requiring speed and consistency. However, traditional fermentation remains essential for styles where yeast character defines the beer. The best brewers know when to use pressure and when to ferment at atmospheric conditions.
Related: The Ultimate Guide to Building and Using a Fermentation Chamber
Common Problems & Fixes
If pressure drops completely to zero overnight, you’ve got a leak. Grab soapy water or StarSan in a spray bottle and check poorly seated lid gaskets, loose spunding valve connections, or faulty pressure relief valves. Try closing your spunding valve completely, hitting the keg with 10-15 PSI of CO₂ to force the lid into place, then checking all connections. If pressure drops but doesn’t hit zero—say, from 12 PSI to 8 PSI—that’s CO₂ being absorbed into your beer, which is normal.
If fermentation won’t start or stalls, you’re dealing with stressed or under-pitched yeast. Don’t apply pressure immediately after pitching—wait 24-48 hours until active fermentation is visible. If fermentation stalls mid-way, release pressure completely, rouse the fermenter gently to get yeast back into suspension, and ferment at atmospheric pressure for a day or two before re-pressurizing.
Spunding valves that won’t hold pressure are either set too low or have debris inside. Set your valve with the fermenter already at target pressure using external CO₂, then dial it in so it just barely cracks open. Krausen in the valve can prevent proper sealing—disassemble and clean thoroughly if suspected.
Never exceed your fermenter’s rated pressure (typically 35 PSI max). Always ensure your fermenter has a working pressure relief valve as backup. Never fully seal a fermenter without a way to release pressure—either a spunding valve or PRV must always be attached during active fermentation.
If beer tastes bland despite proper fermentation, you might be over-pressurizing or applying pressure too early. Try fermenting at atmospheric pressure for the first 3-4 days, then apply pressure for final gravity points and natural carbonation.
Ready to Brew Cleaner Beer in Half the Time?
Pressure fermentation is your ticket to professional-quality lagers and clean ales without expensive temperature control. You’ve got the complete playbook now—from how CO₂ suppresses off-flavors to dialing in perfect PSI settings. The game-changer? Ferment lagers at room temperature, cut timelines in half, and get naturally carbonated beer that stays fresher longer. With a pressure-rated fermenter and spunding valve (under $200), you’re ready to roll. Remember: let yeast establish for 24-48 hours before applying pressure, aim for 10-12 PSI for ales and 15-20 PSI for lagers, and watch for leaks. Sure, it’s not right for every style, but for IPAs and pilsners? Absolute game-changer. Now get brewing!
FAQs about Pressure Fermentation
Pressure fermenting isn’t universally “better”—it depends on your beer style and brewing goals. It excels for lagers and clean ales, producing professional-quality results with faster timelines, natural carbonation, and reduced oxidation. You’ll get cleaner flavors and can ferment at warmer temperatures without off-flavors. However, it strips essential character from Belgian ales, hefeweizens, and English bitters where esters are desirable. Traditional fermentation remains the best choice for these styles.
For ale fermentations, aim for 8-12 PSI to suppress unwanted esters while maintaining yeast character. Lager yeasts excel at 15-20 PSI, allowing room-temperature fermentation (65-72°F) with clean, crisp results. Your target PSI also determines final carbonation—at 68°F and 12 PSI, you’ll achieve around 2.5 volumes of CO₂, perfect for most styles. Clean-fermenting strains like US-05 or Saflager W-34/70 handle pressure exceptionally well.
Pressure fermentation typically takes 5-10 days to reach final gravity, depending on yeast strain, temperature, and beer style. Lagers that traditionally require 6-8 weeks can finish in 3-4 weeks under pressure at warmer temperatures. Ales may complete in under a week. The warmer fermentation temps allowed by pressure speed up yeast activity significantly while maintaining clean flavors. Once gravity stabilizes for 48 hours, your naturally carbonated beer is ready to cold crash and serve.
Pressure won’t stop fermentation if applied correctly, but it can slow yeast activity and stress yeast if mishandled. Apply pressure only after active fermentation begins (typically day 2-3), once yeast has established healthy cell populations. Excessive pressure on under-pitched or old yeast can cause stuck fermentation. If fermentation stalls, release pressure completely, rouse the yeast gently, and allow atmospheric fermentation for 1-2 days before re-pressurizing. Proper yeast pitching rates are crucial for successful pressure fermentation.