Hey there! This site is reader-supported and we earn commissions if you purchase products from retailers after clicking on a link from our site.
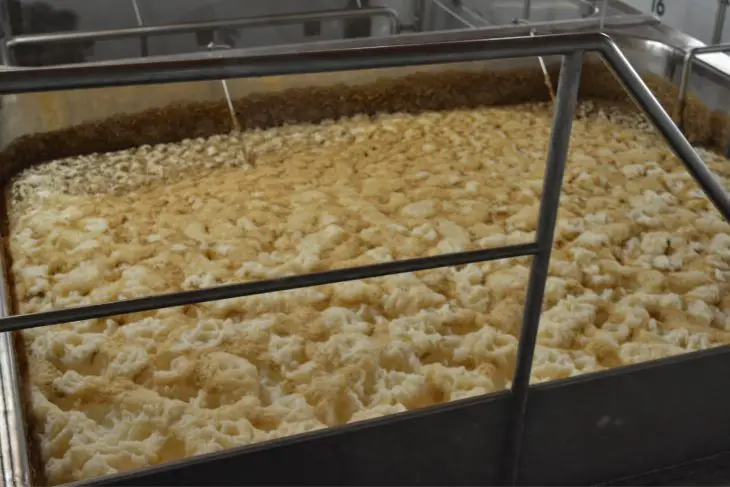
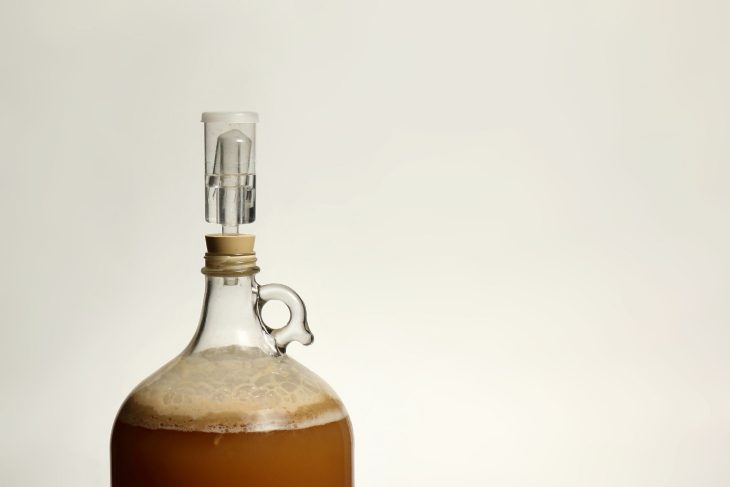
Once your home brewed beer has been mashed, boiled, and brewed, it is time to send it off to the fermenter. You probably have yourself a conical fermenter or bucket or carboy ready to go. But have you thought about how you are going to regulate the temperature of your wort and keep it away from sunlight? The temperature of the wort during fermentation alone will have an astounding effect on the finished product.
In short, you need to have a fermentation chamber set up before putting the wort in the fermenter. For many home brewers, their fermentation chamber is limited by their budget, but you don’t have to get bogged down by heavy duty equipment or technical know-how. In fact, there are probably several wonderful options already in your home.
What is a Fermentation Chamber?
Aside from the fancy terminology, a fermentation chamber really is just an enclosed space that assists with maintaining the internal temperature of the fermenter for optimal fermentation.
Why Light and Temperature Control Matter With Fermentation
Now that you know what a fermentation chamber does, we need to explore the reason why it is essential to your home brewery. The reason is a single word—yeast.
Yeast bacteria are sensitive to the temperature of the wort. Different kinds of yeast will need a very specific temperature range to do their work. This means that, if those certain conditions aren’t meant, your beer won’t turn out as anticipated. For example, if you want to ferment a lager, you need to keep the temperature of the wort between 7-13°C (45-55°F). On the other hand, an ale is going to have a higher temperature zone of 20-22°C (68-72°F).
Also, as the sugars begin to transform into alcohol—making your wort into beer—heat is going to form. It’s called an exothermic reaction. Don’t underestimate how much heat is going to be released either. A 19 liter (5 gallon) batch will warm up between 6-8°C (10-15°F) just from fermentation.
Not paying attention to this could cause some issues with your beer:
1. Esters
When yeast is exposed to too much heat, esters—a fruity alcohol—is produced. This might not sound like a truly horrible outcome, but one too many esters are going to make your beer taste like dessert instead of beer. Some beers, like ales, need some esters to make it more crisp and clean, but you don’t want to overdo it.
2. Fusel Alcohols
In higher temperatures, yeast is encouraged to produce something called fusel alcohols, which is derived from a German term meaning bad liquor. Fusel alcohols are heavier than ethanol and can produce a solvent-like flavor. You don’t want either of those things to happen when you are homebrewing.
3. Diacetyl
Some diacetyl is great, because it adds a touch of buttery smoothness to the beer. Yet, if the fermenting beer warms too much, the beer will taste and smell of utter defeat.
If you accidentally lost track of the temperature for a moment, don’t worry. Sometimes, all your brew needs is a diacetyl rest. The yeast will clean up the compounds. Just don’t let the brew stay too hot for too long.
4. UV Exposure
While on the subject, UV exposure is another problem for your home brewed beer. Sunlight will do more than increase the temperature. It will also impact the finish, flavor, and gravity of the beer. You don’t want skunky beer, so avoid UV exposure at all costs. Fortunately, a fermentation chamber can be the shield.
5. Yeast-Murdering Chill
Heat can devastate your fermenting beer, but what about the cold? The yeast will get sluggish and be unable to perform. If the wort gets too cold, the yeast will fall dormant, and fermentation will stop completely.
You don’t want your beer to get too hot or too cold. Fluctuating temperatures are going to lead to failure. Make sure that the homebrew temperature is consistent during the first 72 hours, reducing the chance of over- or under-fermentation. Those 72 hours after putting wort in the fermenter are critical.
Temperatures and Seasonal Brewing
With more than 5,000 years of history, it is obvious that beer didn’t always need a fermentation chamber to come out delicious. Brewers in the early days of beer didn’t have freezers or refrigerators, and they certainly didn’t know about the chemical profile of beer. No, what they had was trial and error, as well as designated places to brew beer. Those places were often in the dark, such as deep within a cave.
This doesn’t mean you have to go dragging your fermenter to the nearest cave. All you have to do is have the same conditions as one of those caves, such as seasonal temperatures and shadows.
For example, if you live somewhere that experiences all four seasons and varied temperatures, you can make up a beer brewing schedule that takes temperature into account. You might opt to make lagers during autumn and winter, since the temperatures are cool, while hot seasons are ideal for making ale.
The 6 Best Fermentation Chambers
The best fermentation chamber may just be your fermenter in a controlled environment, but as you will see, there are plenty of solutions out there for all budgets. The following six fermentation chambers may be simple to make or purchase, but they all have pros and cons. We considered how easy it is to prepare the fermentation chamber, as well as the ease of regulating the temperature.
Take a look.
1. A Swamp Cooler
This is considered one of the DIY methods for making a fermentation chamber. It’s quick, easy, and best of all, cheap. Basically, you are controlling the temperature of your home brewed beer by submerging the fermenter into a large vat of ice water. In order to make a swamp cooler, you need:
- Lots of ice or freezer packs (or frozen vegetable)
- A big stainless steel tub, bucket, bit, or cooler. You can add a piece of wet fabric to the top of the vessel for accelerated cooling via evaporation.
- An electric fan. If you are trying to cool down your beer in the dead of summer, you can use an electric fan to move the cool air from the ice around the fermenter. Again, this plays on the principle of cooling through evaporation.
- A stick-on thermometer for accurate temperature measurements
To make this work, check the temperature once after an hour of submerging the fermenter. Afterwards, you can wait another few hours to read the thermometer. As the ice melts or packs soften, swap in some new ones to maintain the cooled temperature.
The only problem with a swamp cooler is that it is high maintenance. You cannot walk away from it, especially when the ambient temperature of the space is high. Otherwise, your beer will spoil rapidly.
2. Modifications
It is very easy to take an old refrigerator into a fermentation chamber. You need a few materials:
- A digital temperature controller, such as the Inkbird Digital Temperature Controller, for reading and dialing into the temperature within the fridge or freezer. Make sure you are choosing an automatic temperature controller, since it will maintain the correct temperature and shut off whenever the temperature is reached
- A chest fridge or freezer that is 5 cubic feet or larger
- Someone to help you move your new fermentation chamber
A quick search online will yield plenty of freezer chamber directions. The design is generally the same, but it could change depending on the capacity of the refrigerator or freezer.
You can also incorporate other elements into a pre-built setup. For example, you can grab something like the Propagate Pro Brewing and Fermentation Heat Pad. This is an especially good option if you want to keep a fermenter warm. Although the heating pad was designed for horticulture, it is the perfect size for a bucket fermenter or plastic carboy. Just place it under the fermenter and turn on the heat. That way, you don’t have to worry about gathering a bunch of items to make a fermentation chamber.
3. Son of Fermentation Chiller
Such a name might have you thinking that it is something pulled out of Merlin’s bag of tricks. The Son of Fermentation Chiller was first fabricated by Ken Schwartz, a homebrewer, in 1995. As a DIY project, it was meant to be made by everyday items and provide an easy route to awesome home brewed beer.
Similar to a swamp cooler, the Son of Fermentation Chiller has a thermostat, insulation, and a fan. The chiller not only regulates more effectively than a swamp cooler, it requires far less ice and maintenance.
Recently, Ken has updated the schematics of his original design. Even today, making a Son of Fermentation Chiller is a budget-friendly, convenient way to keep your fermenting beer cool. The only caveat is that you will need some woodworking skills. Also, you should not use 120 VAC household current, as this is a fire hazard.
4. Temperature Controlled Conical Fermenters
We have extensively reviewed some of the best conical fermenters for homebrewers around, though not all of the fermenters have temperature control. The one thing you have to keep in mind is the price tag. That said, stainless steel conical fermenters are excellent for those who are making a lot of beer. They also don’t require any special setup or an external fermentation chamber, since the unit does all of that for you—and they are accurate. More expensive conical fermenters will also let you adjust the temperature to the ideal range.
One option would be the Brewer’s Edge Mash and Boil, an absolute unit in the homebrewing world. This combination brewer and fermentation chamber is expensive, but you get a mash tun, fermenter, and also top-notch temperature control. After mashing and brewing, you can use the stainless steel spigot to draw the contents. The best part is that the cooling and heating can be pre-programmed up to 24 hours ahead of time.
Another one that we recommend is the SS BrewTech Chronical Fermenter. It has 7-gallon capacity and excellent temperature monitoring for a budget-friendly price tag. You can’t go wrong with it.
But if you are going to go this route, there is one thing you cannot homebrew without: a stainless steel coil for pumping glycol or ice water through the unit. At the touch of the thermostat, the pump will turn off or on to cycle.
Rather than using an ice water bath on a fermenter, you should also invest in a glycol chiller. If you are constantly adding ice or freezer packs to the cooler, you have no time for anything else. A glycol chiller can convert a conical fermenter into one with temperature control in no time.
What if I Have a Carboy?
Don’t own a conical fermenter and don’t plan on it? No worries! In reality, any fermenter you have can be easily transformed into a self-regulating unit with something called CoolStix by BrewBuilt. They even work in carboys!
5. A Cool, Dark Room
Remember those caves we mentioned? Turns out, you can make one in your home and never have to worry about bats or stalactites. As long as your home has a cool, dark room, you have a fermentation chamber. Ideally, the space should have flooring that is easy to clean in the event of a spill.
The best places include a walk-in closet, garage, basement, or the bathtub in the guest bathroom. Make sure that there is no natural light to affect the fermenting beer. Also, leave the fermenter along for as long as you can, since any movement could upset the sediment.
This option is ideal for those who have minimal room and budget, or if you brew seasonally.
To make a room into an impromptu chamber for fermenting, you will need:
- Towels and reusable ice packs for cooling. Place the freezer packs or ice between the towels to cool the fermenter as water from within evaporates.
- An electric blanket, warming pad, or something similar if you plan on warming the fermenter.
- A stick-on thermometer so you can measure the temperature of the fermenter easily.
6. Walk-In Cooler or Freezer Unit
Maybe you should construct a place that functions as a chamber. This is one investment that could save you much frustration. Plus, you get bragging rights among your friends for constructing a walk-in cold room. The only things you need are the space to build the room, an air conditioner, insulation, and some temperature control units or hardware. As with many other home brewing related plans, you can also find schematics for cold rooms.
Obviously, this is going to be expensive. The upside? You get absolute control over fermentation, beer storage, and you can also set up tap lines from the storage to your home bar or kitchen.
Buying Guide for Fermentation Chambers

If you plan purchasing a fermentation chamber solution (or parts of one), then you are going to need to know what to look for when buying.
The best fermentation chambers out there are going to have some features in common:
- A way to either manually or automatically adjust and maintain consistent temperatures
- Method for monitoring the temperature of the brew inside the fermenter
- Insulation against light exposure and external temperature changes
- Enough room for the temperature adjustment items and the fermenter
You should also ask yourself a couple of questions.
1. Do I Want to Control Just Heat, Cold, or Both?
Some yeast wants to be pleasantly warm, like sunbathing warm. You may need to invest in a heat mat, carboy jacket, or both to achieve that.
But what happens when you want to cold crash the beer? Cold crashing leaves you with a superbly clear drink. To get that result, you need a temperature-controlled refrigerator or some kind of vessel that gets filled with coolant.
When you want to do both things—the warming and cooling—you are going to need a temperature controller, like the Inkbird that we mentioned. You can connect the controller to any number of coolers and heating pads.
2. How Do I Want to Monitor Temperature?
Not everyone can just stand around with a manual thermometer as their beer ferments. If you do have the time and energy, you can plug in a heating mat and simply check the temperature of the fermenting liquid once in a while.
When you are busy, that might not be doable. In that cause, you should choose a temperature controller for your fermenting chamber that has an automatic shut-off function. It gives you some peace of mind, too. You don’t have to worry about the yeast getting fried or your fermenting beer getting ruined.
If you plan on cooling your fermenting homebrew, you will need a cooler with clearly defined specifications. Some coolers are going to hold onto the chill and will drop their temperature too rapidly to support the yeast.
Final Thoughts on Fermentation Chambers
Regardless of which fermentation chamber style you choose, it is necessary if you want to make the best home brewed beer out there. By maintaining control of the temperature of the fermenting beer, you can eliminate any factors that would imbue foulness. That way, the yeast can do its job optimally, producing beer that tastes phenomenal.
Recommended Reading
How to Make a Yeast Starter For Your Homebrew
Did you know that healthy yeast is the cornerstone of a delicious beer? You can make a top-quality yeast starter easily—and we’re going to tell you how.
Using Cane Sugar vs Corn Sugar For Homebrewing Beer
Cane sugar vs corn sugar, which one is best for homebrewing beer? Either one is fine since both ferment fully; the only difference is in dextrose and sucrose's chemical makeup.
Brewing Recipe for Pilsner Beer
Pilsners have a reputation for being one of the hardest beers to brew. That's why the general pilsner recipe is labeled for intermediate homebrewers.
The Ultimate Hop Substitution Chart
There are over 500 kinds of hops out in the world, so even if a beer recipe calls for a specific hop variety, you can substitute another. We made this handy hop substitution chart to help you find the next best hop.
How to Force Carbonate Your Homebrew Beer Like a Pro
Waiting for your beer to carbonate can feel like an eternity. That is why many homebrewers are making the case for investing in a keg system and learning how to force carbonate beer.
Brewing With Lactose: The Ultimate Guide
Lip-puckering, bitter-as-heck beers... Lactose brewing is something you may want to try if you want to develop your own home-brewed milk stout.
