Hey there! This site is reader-supported and we earn commissions if you purchase products from retailers after clicking on a link from our site.
Have you ever looked at the hundreds of empty beer bottles just waiting to be filled with your delectable homebrew and wondered, “There has to be a better way to store my beer”? Turns out, there is! Welcome to Introduction to Home Kegging (Kegging 101), where you learn about kegging your homebrewed beer. Although kegging is not for everyone, and you may have to rearrange your homebrew setup to make it work, it is definitely worthwhile in the end.
Class is in session.
Table of Contents
- What Do You Need to Start Home Kegging?
- How to Disassemble and Clean Your Home Kegging Setup
- Cleaning The Keg
- Sanitizing Your Keg
- How to Fill Your Keg With Beer
- Sealing and Pressurizing the Keg
- Refrigerating The Keg and Tank
- Serve and Enjoy
- What Are The Pros and Cons of Kegging?
- Now You’re a Certified Home Kegger
- FAQs
What Do You Need to Start Home Kegging?
Put the bottle down! You won’t be needing it anywhere. Here is what you need to build your own home kegging system:
- Kegs
- CO2 Tank
- Connectors
- Faucet
- Tubing
- O-Rings
- Regulator
- Refrigerator
Let’s look at each of these components in detail.
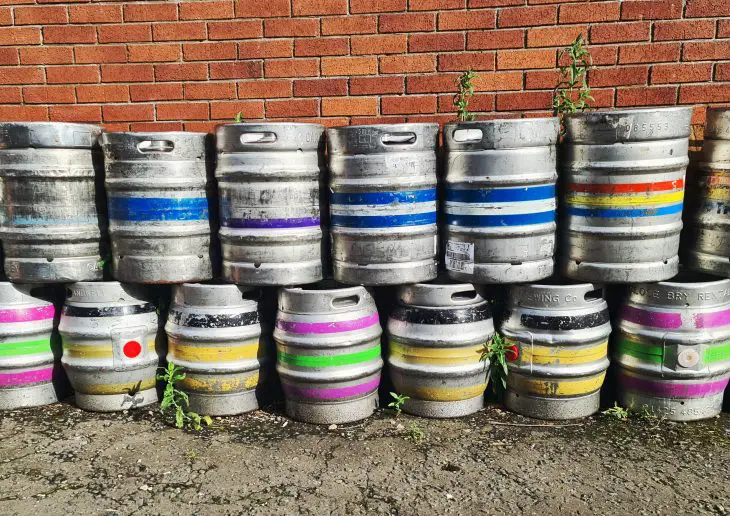
Kegs
A keg is a small cask or barrel that generally runs between 5-10 gallons. Some can reach up to 30 gallons.
The favorite among homebrewers is a Corny or Cornelius keg—a five-gallon stainless steel keg—that is differentiated by either a pin-lock or ball-lock. People have their preferences, and you may choose one or the other. However, once you do, try to stick with it. Otherwise, you will need to go out and buy a whole new set of fittings and connectors.
Having trouble deciding which to get? Check out this video:
Also, here is a quick keg anatomy lesson. Kegs are usually made of stainless steel and have rubber handles up top. On the top of the keg is a hatch or oval-shaped lid that is held in place with a clamp. If you decide to purchase a used keg, do not choose one with a dent or ding on the hatch. Even small dents can compromise the seal.
There are also two posts on the keg. One is for gas. The other is for beer. Though the posts are similar in appearance, they cannot be swapped. The post for gas is usually marked with an IN. In ball-lock kegs, there is a quick disconnect that is usually colored gray. The post for liquid will be marked with an OUT and has a black label.
CO2 Tank
Carbon dioxide is the spice of life. Without it, you would have a very flat beer. Thus, you will need a CO2 tank to carbonate your homebrew. Same as your keg, you will need a five-pound tank. They are relatively light and transportable. That said, 20-pound tanks are much more economical if you aren’t pushing beer around all the time. When choosing a CO2 tank, make sure it has been certified.
Connectors
Every Corny keg has two connection points: one for pushing carbon dioxide into the beer and another for dispensing the brew. Some kegs come with something called a quick disconnect, which can be stainless steel or plastic, and are easy to remove. Pin-lock liquid and gas connectors are visibly different from ball-lock ones. However, all ball-lock connectors look the same. Try to choose different colors, so you can tell the beer connector apart from the gas connector.
Faucet
You will need a tap or faucet to regulate the flow of the beer when pouring it. One of the most affordable options is called a picnic tap or faucet. If you prefer a more aesthetically pleasing look, tap handles also work on some kegerators.
Tubing
Food-grade tubing is required to connect both the faucet and CO2 connection points. Buy around 3.5-4.5 feet of both. For setting up draft lines, 3/16 ID tubing is recommended.
O-Rings
These rubber circles are necessary for creating seals in places like the keg’s hatch. If you have bought a used keg, consider replacing every single O-ring you can find before using the keg. They should not have any smell or staining on them.
Regulator
A single tank of CO2 has a pressure of about 800 psi. That is way more than what you need to carbonate your brew and make it potable. For that reason, you will need a regulator. These devices screw directly onto the CO2 tank. You can set the preferred amount of psi and then monitor what happens.
Refrigerator
In order to successfully keg your homebrew, you will need a refrigerator to house the keg. Optionally, you can purchase a kegerator that has built-in temperature controls. Kegerators that do not come with temperature controls can have them installed DIY. Regardless of how it is done, you will need to bring the temperature down to 35-50 degrees F (1 to 10 degrees C), depending on the type of beer.
How to Disassemble and Clean Your Home Kegging Setup
One of the greatest mistakes those new to homebrewing make is not cleaning and sanitizing everything. You may think that purchasing a brand new keg, CO2 tank, connectors, tubing, and everything else means those items are clean. Well, not exactly.
That is why you will need to disassemble the keg. Don’t worry. Putting a keg back together again is not that difficult.
You begin by depressurizing the keg. Some kegs come with pressure release valves, making this step easy. If there are no valves on your keg, grab a screwdriver and push the end down against gas-in fitting poppet. That will allow any gas inside to escape. Once you are done with that step, lift the hatch bail. Lower it halfway into the keg then remove it entirely.
The hatch may not move. This means that there is still some pressure within the keg that needs to be released. So if that happens, return to the pressure release valve or pick up your handy screwdriver for a second time.
Next, you move onto the O-rings. The first one you will see is on the top side of the keg. Pull it off. You should now have access to the gas and liquid fittings. Remove the dip tubes under the fittings, too. Each of these also comes with a small O-ring, so you will have 5 in total now (4 from the fittings, and the one from the top hatch). If any O-ring looks dirty or smells off, exchange it for a new one.
Congratulations, you have disassembled your keg.
Cleaning The Keg
You have the bits and pieces of your keg laying around. The first step to cleaning it is to consider if you need any upgrades. For instance, if the dip tubes on your keg are made of plastic, you can take this time to swap in stainless steel ones. Dirty or aromatic pieces of the keg should be replaced as soon as possible, as these things could affect your beer.
The second step is to wash any sediment out from the keg. Fill the keg with warm water and a decent portion of your preferred cleaner. There should be enough room in there to toss in every other piece that has been removed. Let everything soak for a couple of hours.
If the sediment is not lifting, take a carboy brush to remove the grime and stains.
Next, empty out all of the cleaning solution. Returning the fittings to their proper spots, including the O-rings. Be sure that everything is replaced properly. Once again, you will fill the inside of the keg with warm water mixed with your cleaning solution. Seal the keg’s hatch then set it upside down for another few hours. Doing so cleanses the top portion of the keg.
When you are ready, flip the keg back over, empty out the fluid, and then rinse with hot water several times.
Sanitizing Your Keg
Think you are done cleaning out the keg? Not yet. You still need to sanitize it. To do so, fill the keg to the brim with your preferred sanitizing solution. To avoid having to rinse out the keg all over again, a no-rinse solution is recommended. Be sure to follow the instructions on the bottle to achieve the proper amount of dilution. The keg—with all components attached—will need to sit in the sanitizer solution for 10 minutes. Once 10 minutes are up, flip the keg over—ensure the hatch is closed first—and give it another 10 minutes.
Any other homebrewing equipment that you need to transfer your beer should also be cleaned and sanitized during this time.
When the 20-25 minutes of sanitation is complete, attach the CO2 tube, as the gas will push the sanitizer from the keg. Connect a sanitized length of tubing to the liquid fitting of the tank then attach the fitting to the liquid post on the keg. Do you want to sanitize additional items? You can connect the end of the tube to a collection vessel, such as a fermentation chamber, keg, or carboy.
Connect the CO2 tank to the gas post on the keg using the proper gas fitting. Set 5 psi on the regulator. Once the tank is working, the sanitizing fluid will slowly flow from the keg into whatever you are using to collect it. You will hear a hiss from the gas once the CO2 has been pushed out. Turn off the gas and remove the gas and liquid fittings from your keg.
Onward to the next step.
How to Fill Your Keg With Beer
Do you have a beer that is fermented and ready for kegging? Good. You have a clean keg, so let’s get to transferring.
Check out this video for some handy tips first:
Racking beer into a keg is going to feel similar to bottling it. You will need to work without introducing any oxygen into the beer. The best method is to first drop the internal pressure of the keg to the atmospheric by pulling the pressure relief valve on the keg. Next, put the free end of the racking hose to the liquid fitting barb. Connect that some fitting to the liquid post on the keg.
From there, you take another section of tubing and attach that to the barb of the gas fitting before securing it onto the gas post. Put the end of the gas tube in the sanitizer you collected.
Beer will move from the fermentor into the hose and then into the keg through the dip tube. Meanwhile, the CO2 in the keg bubbles out and into the sanitizer as it is pushed out by the beer. Allow the keg to fully fill with beer before shutting off the CO2. What is inside the keg is an uncarbonated beer with hardly any oxygen inside.
Sealing and Pressurizing the Keg
You have triumphed over racking your beer into a keg. Now, it’s time to add some carbonation to the brew. The ideal amount of carbonation is based on the style of beer you made. Typically, if you don’t know what the carbonation level should be, 2.0 volumes of carbon dioxide is a decent place to start.
Next, it is time to consider how cold the beer has to be to carbonate. Cold beer is much easier to carbonate, which is why a temperature controlled keg or refrigerator is essential to home kegging. Assuming your beer is around 42 degrees F (6 degrees C) when refrigerated, you will be within the 2.1 to 2.6 volumes of CO2 range. For English styles, you may want around 1.5 to 1.8 volumes of CO2, while German weizens work better with around 2.8 to 3.0 volumes of CO2.
For 40-42 degrees F (5-6 degrees C), at the desired 2.4 volumes of CO2, you will need around 10-12 psi of CO2 to adequately carbonate.
Unsure of what temperature to choose? Instead of doing the math, refer to this nifty carbonation chart by Kegerators.com.
When you have determined the amount of pressure you need to carbonate, it is time to get the process moving. Hook the CO2 tank to the keg. Set the regulator to the required psi. Switch on the CO2 tank and listen to make sure the gas is flowing correctly. Eventually, the pressure will start to equalize and the flow of gas will come to a stop. This is normal. Since the keg is sitting upright, there is little room for the CO2 to go at first.
Over the course of the next 36-48 hours, check out the pressure.
Refrigerating The Keg and Tank
After all that hard work, refrigeration is the easy part. Your beer needs about a week or so to fully gas and then absorb the CO2 for carbonation. During this time, you may pace around the keg, wishing for your beer to finish faster, but this is certainly a waiting game. If you want to speed things up slightly, you can temporarily increase the CO2 psi to about 20-25 and let it sit for 24 hours. Optionally, agitate the beer in the keg a tad.
What does it mean to agitate? Give it a quick shake. Moving the contents within the keg allows for the CO2 to contact even more of the beer. Turning up the pressure on the carbon dioxide works the same way. If your regulator lacks a check valve, do not tip it sideways or roll it around to agitate it. Keep it upright by giving it a shake or two.
However, while your beer may carbonate more quickly, do let it rest for a few days. Green beer is not a good beer.
Serve and Enjoy
Time to raise your empty glass up and celebrate! You can now drink your kegged homebrew. In order to draw some beer from the keg, attach the tap handle or faucet to the beer-out connection. Start to depress the lever. Your carbonated beer will start flowing out in all its golden, red, or brown glory. Take a moment to gaze at the bubbly, frothy perfection of your brew before taking a sample sip.
Oh No! I Poured All Foam!
Don’t be discouraged. This is going to happen. Foaming is caused by a couple of different reasons. You may have a dirty draft line. Let’s assume, though, that you cleaned and sanitized everything and that this has more to do with tap height, diameter, and the height of the draft line.
The ideal setup for connecting your keg to a draft line is to push the beer through 3.5-4.5 feet (1-1.4 meters) of 3/16 wide tubing. This should resolve any foaming problems right away.
It is also recommended that, when first pouring, you set the pressure on the regulator to around 2-3 psi. Shut the gas off if you are using a ball valve keg. Then take hold of the pressure relief valve and vent a good amount of pressure from your keg. Try to dispense a little beer. Almost nothing should come out. Reopen the ball valve then try pouring a second time. Continue increasing the pressure until the pour is almost foam-free (or has the desired amount of head in your glass).
What Are The Pros and Cons of Kegging?
Having learned the whole kegging process, you probably have a good impression of what is going to happen. Still, you should weigh your options. Even if you are tired of washing hundreds of beer bottles, only to have to fill each one, again and again, you should know the pros and cons of kegging.
The main benefit of kegging is its time-saving efficiency of it. You do not have to stop and start when filling bottles and capping them. You can easily transfer your beer straight into the keg and then carbonate them overnight. Plus, using the keg means you don’t get any sediment in your beer, as you may with bottles.
Home kegging is also mess free on most occasions unless a tube leaks or detaches from the keg during your beer transfer. That said, you do not have to worry about your bottles exploding because of too much priming sugar.
On the other hand, you have to consider the time it takes to disassemble, clean, sanitize, reassemble, and prepare the keg for use. It could be a cumbersome task, depending on the size of the keg. Additionally, if you do not have a kegerator with temperature controls, finding a refrigerator to house both the keg and tank might be an absolute pain. That is by far the biggest challenge to home kegging.
Another issue that many homebrewers run into is when they add a tap handle to the keg or attach it to the home bar. There is a certain amount of maintenance required to keep the kegs functioning properly. Bottles do not require any maintenance, and they are far easier to store.
Now You’re a Certified Home Kegger
Once you have crafted the perfect pint, you need someplace to put it. Now that you know how to go about home kegging your beer, you are better equipped to store each and every brew. Home kegging might have a pricier startup cost compared to bottling, but it’s a skill worth mastering. You can potentially save time and get to sampling your beer sooner. Cheers to that.
FAQs
No, bottling actually costs less than kegging your homebrew beer. You can get bottles for free from friends and family or buy them at a reduced cost online. Kegs have a more expensive price tag in the beginning for that reason, because you need more equipment.
The basic setup for home kegging includes a keg, a tank of carbon dioxide (CO2), a hose, and a regulator. Depending on the size of your batch, you may need more than one keg. You will also need a temperature-controlled refrigerator that can house both the keg and the CO2 tank simultaneously.
Once you have kegged your beer, it will need to be continuously gassed with CO2. This process takes around 36-48 hours. After that, the beer needs a few days to rest and absorb the CO2. Afterward, you could technically drink it, but the beer will not taste as good as if you waited a week or so after gassing it.
Recommended Reading
Home Brew Beer Ingredients List
There is a lot that goes into beer, but the main ingredients are your hops, grains, water, and yeast. Without that, you wouldn’t get the heavenly delight we call beer.
All-Grain vs. Extract Brewing: Equipment and Process Differences
If you’re taking up homebrewing and are confused about the differences between all-grain brewing vs extract brewing, we’ve got you covered.
Sweet Beers: Your Ultimate Guide to Drinking and Brewing Sweet Beers
If you are looking for more information on sweet beers, this Ultimate Guide to Sweet Beer will tell you everything you need to know and more.
Controlling Mash Temperature – An Essential How-To Guide
The best beer begins with the best mash; to get it, controlling mash temperature is key. Understand how temperature changes the very nature of the wort and control it!
Does Moonshine Go Bad? What You Need to Know
Did you finally pull that gifted homemade moonshine from last year out from the back of the refrigerator? You may be wondering, “Does moonshine go bad? Is this fit to drink?”
Inventing Beer Recipes – A Guide to Designing Homebrew
If you want to know about inventing beer recipes, you are in the right place. Today, you are going to get the inspiration you need, as well as a step-by-step guide to help you along the way!
