Hey there! This site is reader-supported and we earn commissions if you purchase products from retailers after clicking on a link from our site.
Congratulations on deciding to start one of the best hobbies ever. Okay, maybe we are a bit biased, but homebrewing your own beer is an awesome, fulfilling, and truly enjoyable journey. You will learn something new every single time you whip up another type of beer. But first, you need to arm yourself—and your kitchen—with essential brewing equipment.
You will find that homebrewing requires a balance of creativity and exactness. In order to brew up some real masterpieces, you need to commit to a decent setup, the right equipment, and a whole lot of patience. Investing a bit in your homebrewing equipment will help you in the long run, since you will be able to work more efficiently.
So, if you are looking for the best tasting beer possible, then you need the right kinds of gear and tools. No matter your skill level or budget, this list of top brewing equipment is for you.
Table of Contents
- Books on Homebrewing
- Beer Brewing Kits
- Mash Tun
- Home Brew Hydrometer
- 6 Gallon Primary Fermenter
- Conical Fermenter
- Variable Capacity Fermenting Tanks
- Plastic or Glass Carboy
- Thermometer
- Cleaner & Sanitizer
- Line Cleaner
- Beer Sanitizer
- Brew Pots (and Other Boiling Equipment)
- Tubing
- Digital Scale
- Long Spoon or Paddle
- Propane Burner
- Wort Chiller
- Airlocks & Bungs
- Brew-in-a-Bag Equipment
- Blow-Off Hose
- Racking Canes & Auto-Siphons
- Beer Bottling Accessories
- Drying and Storage Racks
- Labels
- Homebrewing Extras That Level Up Your Equipment
Books on Homebrewing
Sure, books are not really considered brewing equipment, but they are essential. Educating yourself on homebrewing before you begin your journey is smart. Everyone needs some literature to pave the way. Some of the best books for beginners include “Homebrewing for Dummies” by Marty Nachel, “Designing Great Beers” by Ray Daniels (a little dated but still very informative), “The Complete Joy of Homebrewing” by Charlie Papazian, and “Homebrew Beyond the Basics: All-Grain Brewing & Other Next Steps” by Mike Karnowski.
But you don’t have to stop there. Many books on homebrewing exist, so shop around and load up your brewing library with information on equipment, terminology, and even recipes.
Beer Brewing Kits
You might think that purchasing everything separately is the way to go. In reality, beer brewing kits are an economical way to get started. You get everything you need for any kind of brewing, including all-grain brewing, within a kit.
Beer brewing kits are available for any kind of beer. When searching for a beer kit, you will find that they contain a single liquid malt extract, grains, or a combination. Some kits will contain just the ingredients needed for a single recipe—hops, grains, extracts, and so on. The more expensive home brew kits will come with gear or additional tools.
Before making a purchase, be sure to evaluate the cost of the kit and what comes with it. You may need to buy additional items or ingredients, and that can negate any savings.
Now, let’s talk about the different types of beer brewing kits you can find:
- All-grain brew kits: For the intermediate home brewer, an all-grain brew kit allows you to use grains without having to go through all the labor. All-grain brew kits nix malt extracts and use premixed milled grains. They are a bit more expensive than extract brew kits.
- Extract brew kits: The most reasonably priced and aimed at beginner brewers. These require hardly any equipment. Just add water and the kit’s ingredients to your brewing kettle. Cool your wort, put it through the fermenter, then let it sit for a week or so before bottling. In short, extract brew kits skip mashing, reducing the time it takes for brewing.
- Partial mash brew kits: If you are looking for a balance between using extract kits and setting up a complete brewing station in your use, check out a mini-mash or partial mash brew kit. You will need a kettle, grain bag, bucket, and drink cooler. These kits help you gain experience as you move towards all-grain homebrewing and save you money in the process.
You may also buy equipment kits for homebrewing. Instead of shelling out money for every single piece you will ever need, you can find the appropriate equipment kit for whatever kind of beer you wish to prepare.
Our recommendation is to look at the recipes for the beers you would like to make, come up with a list of materials and tools you will absolutely need, and then see if you can find a bundle that contains all those pieces. Compare the cost of buying each separate piece to the cost of a kit.
Mash Tun
There may come a time when you need a mash tun. That time is usually when you decide that you want to attempt all-grain brewing. As an essential piece of all-grain brewing equipment, you are going to need to decide whether you would like to purchase a prefabricated mash tun or if you have the items available to make a DIY version of a Mash Tun.
But what is a mash tun for? A mash tun is for starting with raw grains for malt and heating them to extract the sugars you need during fermentation. The process is called mashing—the transformation of starches in malted and unmalted grains.
The mash tun solves three issues a brewer might have when mashing: heat retention, filtration, and collecting wort.
Some mash tuns are available from online homebrewing stores and look a bit like kegs. You can build your own mash tun, however. Using a beer cooler, a false bottom, a spigot, and some O-ring seals, you can set up a DIY mash tun.
Home Brew Hydrometer
Looking a little like an under-the-tongue thermometer, a hydrometer is an indispensable tool. Any home brewing laboratory would be incomplete without one. With it, you can figure out the alcoholic content of your brew.
The hydrometer floats in either beer or wort, depending on the step you are on, and measures the density of the liquid.
Reading a hydrometer takes a bit of practice. You will want to use a testing jar of the appropriate size—usually around 25.4-35.5 cm (10-14 inches) tall. A larger hydrometer will need an even bigger testing jar. Make sure your jar is made of plastic or clear glass.
Place the hydrometer in a testing jar filled with wort or beer. The surface of the liquid should line up with the markings on the device. From eye level, check where the liquid falls across the tube. With surface tension, the liquid curves upward. You get the most accurate reading from the lowest point of the curve, also known as the meniscus.
6 Gallon Primary Fermenter
You will find that many home brew beer recipes tell you to use 5 gallons of water, meaning most recipes yield around the same amount of beer. That means that a 6 gallon primary fermenter is the perfect size. That extra space will give plenty of room for krausen—the foam that rises throughout fermentation.
The fermenter should also come with a stopper, airlock, and faucet. You will need the stopper and airlock to let the carbon dioxide escape. The faucet will make life much, much easier when you go to transfer the beer to the carboy for a second round of fermentation.
Conical Fermenter
Fermenter buckets aren’t the most exciting thing to have around. That is why a couple of companies have decided to produce conical fermenters, which look more like commercial equipment than at-home tools. Because of this, you can expect a much higher price tag than you would with a regular fermenter.
The fermenter is shaped with a conical bottom. The tip features a valve. The shape is excellent for having solids in the fermenting beer settle into the cone, where it will be drained from the tip. Effective, right?
Variable Capacity Fermenting Tanks
For the serious home brewer, a variable capacity tank is going to be a worthwhile investment. These tanks adjust to the size of the batch you are making. For example, if you have a seven gallon fermentation tank, it will be good for 1-6 gallons of wort. There is a lid that goes inside the container that is fitted with an inflatable gasket, making it possible to seal from any point.
Adjusting the batch size is also easy. Simply position the lid to the correct height. From there, the seal is made. Most variable capacity tanks also have an airlock included. You can also purchase models with ball valves for easy transfer.
Plastic or Glass Carboy
After the beer runs through the fermenter, you transfer it to a carboy. There, the beer will sit for secondary fermentation, which generally lasts between 10-14 days. Cheaper carboys are going to be made of a heat-resistant plastic, while others are crafted from glass. Though it is a matter of preference, some many find that glass carboys are far more easier to maintain. You will also be able to see the health of your beer through the carboy instead of having to open the airlock to see inside.
Don’t forget to buy yourself a carboy cleaning brush—unless you are using Oxiclean 24-Hour Soak or PBW or something similar to clean and sanitize your carboy. Otherwise, you may need a designated brush for those moments you are in a rush and forget to thoroughly sanitize your carboy. A brush can also remove any sticky or persistent grime.
Thermometer
You will soon realize how important temperature control is when home brewing. Temperature dictates the outcome of fermentation. If your water is too cold, the yeast will remain catatonic. Too hot, and you risk bacterial growth and dead yeast.
In a pinch, you could use a meat or candy thermometer. Your brew will come out satisfactorily. However, it is always nice to have a dedicated thermometer that provides an accurate reading. A floating thermometer will do well, though a stainless steel probe is the best.
For fermenting, you can purchase press-apply adhesive thermometer strips. They are cheap, easy to apply, and will help you manage the temperature much more easily (and without disturbing the fermenting beer). Stick these thermometers onto the carboy for an instant reading.
Cleaner & Sanitizer
We cannot repeat it enough: clean and sanitize your equipment. Dirty brewing equipment is an open invitation to horrible flavors and flat, dissatisfying beer. So, while it may seem like a mess to clean and sanitize everything you use, it is well worth it.
Before we talk about the types of cleaners and sanitizers every home brewer needs, there are a few things we need to mention.
Firstly, regular cleaners and cleaners made for homebrewing are not equal. Yes, buying ordinary household cleaners will save you money. Except, the money you save will be wasted, because you will have to wash your equipment multiple times just to get it properly cleaned. You can use a good unscented bleach as an alternative sanitizer, but it does not rinse well. Bleach clings, so be sure to rinse any items you wash at least 3 times.
Secondly, you should never use dish detergent or soap, because they will leave a residue behind that affects the beer’s head.
Also, when cleaning, make sure you have a non-abrasive scrubber and brush. Any scratches in your brewing equipment are going to attract yeast and bacterial growth.
Line Cleaner
Line cleaners are available in tablet, powder, or liquid form. The reason why you want to use homebrewing line cleaner is that it is specifically formulated to attack bacteria and biofilm that tends to grow in beer tubing. Always flush out the tubes before using them, because the formulas tend to be caustic.
The best all-around homebrew cleaner is Star San (as mentioned below). If you are looking for a cleaner that works exceptionally on beer lines, choose BLC or Bar Keeper’s Friend. The latter is mainly for stainless steel but works well with all kinds of materials.
Another option is Five Star P.B.W. Cleanser or OxiClean, depending on what you can find. P.B.W. is pretty expensive, though, and can be difficult to find. However, for the price, it performs extremely well.
Beer Sanitizer
You’ve got plenty of options out there, but only some sanitizers will do their job. One of the best sanitizers you can use is called Star San. Use it to sanitize every piece of equipment that comes into contact with wort after it has been removed from boiling.
Star San is flavorless and food-grade, so it is safe for people and the environment. You also do not have to worry about it affecting the flavor. The best part? You don’t need to soak your equipment for long periods of time to get it clean. Star San sanitizes in the blink of an eye. Okay, maybe not a blink, but around 1 to 2 minutes, and you don’t have to wash it off, either.
Brew Pots (and Other Boiling Equipment)
Unless you have yourself a no-boil brewing kit, 9 times out of 10, you have to boil your concoction. Otherwise, the magic won’t happen. Most recipes require at least 60 minutes of boiling hops. During this period, isomerized alpha acids are created, which lends a bitterness to the brew. Boiling also stops any enzymes and cuts out sulfuric compounds that would produce a gross flavor.
Here is another reason you need to boil: sterilization. Bacteria in the brew could upset fermentation. Secondly, during the boiling, the gravity and volume is established.
So, you are going to absolutely need a brew pot or two. A brew pot is also referred to as a kettle. Yes, you could use the same stove top pot you use for making stews, but having a high quality brew pot will take your beer to the next level.
What should you look for in a brew pot? Stainless steel with a tri-clad bottom. Despite the expense, a stainless steel brew pot will not get discolored. Have a small budget? Aluminum will work just fine. Some models will have features that make brewing less arduous. For instance, some have volume markings. You can get one with a ball valve and strainer, allowing you to drain without needing a siphon tube. Handles wrapped in silicone make handling the hot kettle safer.
Choosing the right sized brew pot is the next step. You will find that a 6 gallon kettle will work for most recipes, but you may run the risk of your wort seething over the edges. Instead, consider grabbing an 8-gallon brew pot for 5 gallons of wort when using an extract brew. If you plan on doing all-grain brewing, then you are going to need a 10-gallon brew pot for 5 gallons of all-grain wort. Brew in a bag (BIAB) requires a 15-gallon kettle for 5 gallons of wort.
Tubing
Though tubing is one of the least exciting pieces of brewing equipment, it’s essential. You need tubing to shuttle fluid from one place to another without dirtying it. You will need to buy multiple tubes, since they can get clogged rapidly. Also, you will need to study up on the sizing and types to ensure you are using the right tubing for the task.
- Siphon Hose Tubing: You will most often need tubing once the beer has finished its primary fermentation and needs to be moved to another one or bottled. Always sanitize your siphon hose. The best material is food-grade vinyl, because the walls of the tube are thin, flexible, and easy to handle.
- Silicone Tubing: When you need to transfer hot wort, select silicone tubing. It is more resistant to heat than other materials. Plan on using a pump? Verify the pounds per square inch (psi) for the tubing to make sure it will tolerate the pressure created by the pump.
- Vinyl Hose: Also called vinyl beverage tubing, this is ideal for when you have beer lines or need to infuse something with carbon dioxide. Beverage tubing is not the same as a siphon hose, though it is made of the same material—vinyl. Beverage tubing has antimicrobial properties and is rather thick.
Digital Scale
Those who are just starting out can skip a digital scale for your first couple of attempts. Afterwards, as your skill increases and the recipes you try get more difficult, you will want the accuracy of a digital scale. Measuring ingredients, particularly your grains and hops, will perfect the blending. Plus, you will be able to record the measurements of your most successful brews so you can recreate them later.
Also, if you intend to use flavorings—like spices and herbs—you will need a digital scale to measure them out precisely. Get a scale that reads out in grams.
Long Spoon or Paddle
Stirring your wort while it is boiling is always a good idea. A good stir will stop the hops from sticking to the bottom of the kettle and burning. If you are making a mash, you will also need a long enough utensil to stir it up. Choose one that is about 30-91 cm (1-3 ft) long. Brewing utensils will usually have little slits or holes to help you break up a mash. The best materials for utensils include wood, stainless steel, bamboo, and heat-resistant materials like plastic or silicone.
One thing to consider: wood is harder to sanitize than stainless steel. If you can afford it, get stainless steel utensils. Less chance of odd flavors popping up.
Keep in mind that you should only stir the wort during boiling. Once your wort is in the fermenter, resist all temptation to stir it.
Propane Burner
If putting your brew pot on top of the stove is impossible, you might resort to a hot plate or a propane burner. When choosing a proper burner, there is one thing you cannot overlook. You need the appropriate BTU (British thermal units). 1 BTU is equal to the amount of heat required to raise a pound of water at max density by 0.56°C (1°F).
The average kitchen range has about 7,000 BTUs. A decent homebrewing propane burner should put out much more than that. However, a greater BTU is not always better. You can use a camping burner if you cannot find a decent propane burner. Choose one that is more squat, with wider set legs so a larger pot can sit on it without tipping over.
Wort Chiller
Once you have boiled your wort with the hops, the cooling part becomes crucial. The faster you cool the wort, the less chance of bacteria proliferating. Give bacteria time to grow, and your beer will be doused with dimethyl sulfide (DMS) and end up with a foul taste or look cloudy. But, how do you cool your wort rapidly?
You get a wort chiller. There are three kinds of consider:
- Immersion wort chiller: A reasonably priced option. Basically, you take a copper or stainless steel frozen coil and immerse it into the wort. You then connect the coil to an adapter, switch it on, and the coil works to cool the brew. Make sure you purchase the correct sized coil for your brew pot.
- Plate chiller: This is the fastest method for cooling wort but also one of the more expensive. A plate chiller consists of multiple layers that are placed within the wort. One issue with plate chillers is clogging.
- Counterflow chiller: Similar to an immersion chiller in design, except you put the tubes on either side of the kettle. The tubing is flushed with cool water, while an inner tube draws hot wort from the kettle, in the opposite direction of the cold water. You don’t need as much cold water as you do with an immersion chiller, and the counterflow works rapidly.
Airlocks & Bungs
Next up, we have the all-important airlock. What it does is release carbon dioxide during the fermentation process without reintroducing oxygen into the tank. As pressure builds inside the airlock, any excess CO2 is pushed through your beer and then the airlock. Since fermentation airlocks are on the cheaper side, you should definitely pick one up and stop oxidation in its tracks.
After airlocks, you have something called a bung. Rubber bungs are not very interesting, but you do need them for sealing things like mash tuns, fermenters, growlers, and carboys. When you go searching for bungs, you will find that there is a selection categorized by size (000 through 12). The numbers designate the top and bottom diameter.
These sizes are universal, though some may be off by a millimeter or two. Double check to make sure the sizing is going to match up with your equipment. If you plan on using a bung with an airlock, make sure the bung has a pre-drilled hole. That will save you some frustration.
Brew-in-a-Bag Equipment
Thinking about trying out all-grain brewing? Rather than jumping right in, take a baby step towards that with the brew-in-a-bag (BIAB) method. You will only need two pieces of brewing equipment: a kettle and a nylon mesh straining bag. You should already have the kettle, so the only thing you need is the bag. Another option is to buy a complete BIAB brewing kit.
Blow-Off Hose
This is not the same as the other tubing, since it partners with the airlock on the fermenter. The blow-off hose can be used in place of the airlock for the first few days. While optional for most brewers, a blow-off hose can save you from a lot of mess. Allow us to explain. A blow-off system is basically a long tube that is connected to the fermenter that lets foam from the container drain.
Some people feel that diminishing the krausen—the foam—can make the beer taste better. This comes from the idea that there are astringent compounds in the foam that get expelled when using a blow-off tube.
The other reason you might consider a blow-off system is for an easier time. Some beers explode with foam. Stouts and wheat beers can commonly cause foam geysers in the fermenter, especially when the room temperature is warm. Sometimes, the carboy is not enough to contain it all. So, you use a blow-off tube to relieve some of the pressure within the carboy to keep the airlock from getting congested.
Racking Canes & Auto-Siphons
So, we have touched on tubing and why it is necessary to have around. Next, you are going to need something that gets the beer flowing through the tubing. A racking cane is one way. Shaped like an L, these glass, plastic, or stainless steel tubes are attached to a longer tube then inserted into the beer.
Then comes the siphoning part. Using your mouth to start the flow is only going to introduce bacteria. You can either use a plain racking cane and tube, in which you would need to fill the tube with clear water, seal off the end of the tube, and then insert the other end into the beer to get it flowing.
Otherwise, you have the auto-siphon option. An auto-siphon is a racking cane and tube combination that operates more like a plunger. You will love the convenience.
Beer Bottling Accessories
So, you have waited a few weeks to taste your beer. You can’t just gulp it down straight from the carboy. That would be a messy affair. Instead, you can pour the beer into a keg or bottle it up for enjoyment.
Here are some accessories that help you do just that:
Growlers
Want to give the gift of your homemade brew? Growlers will help. You can find growlers made from stainless steel, ceramic, stoneware, or glass. Most are available in sizes between 32 oz to 2 liters. Growlers are also great for limiting exposure to air, which will cause oxidation and mess up the beer’s flavor.
Beer Bottle Brush & Funnels
One thing many overlook then desperately need is a funnel or a brush. You can do a lot with brushes and funnels. Both are available in a broad range of sizes. Some funnels have internal filters that catch any residue left over from boiling or fermentation.
A number of brushes exist, too. Some are designed to clean out tubing, carboys, kegs, and more. You can even find faucet caps with brushes included.
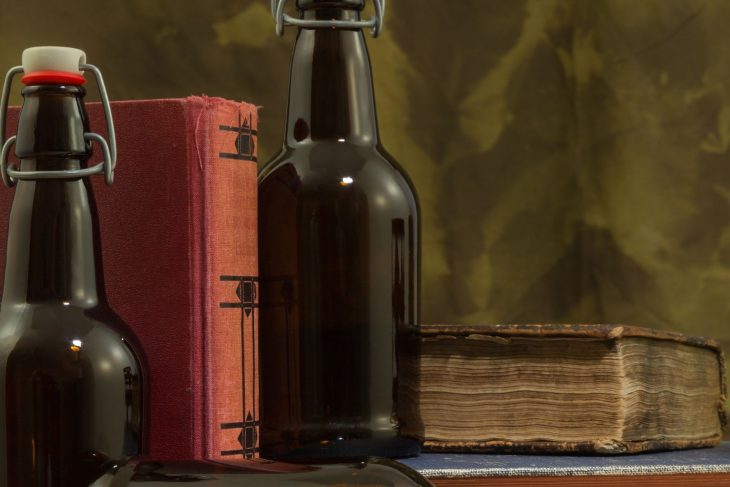
Bottles
You can purchase a range of sizes: 12, 16, 22 ounces; liters; 750 mL; and more. You can choose the color of the class, too. Amber and clean are common, but you may be able to find greens or other shades. You may even try a swing-top bottle, which has a hinge, kind of like a Hermes jar.
Caps
Bottles are sealed with caps. Keep in mind that the caps are not reusable. You can upgrade with oxygen-absorbing caps to reduce any oxidation.
Caps often come in a variety of sizes and colors. Get personalized caps, silver-crowns, plain, or something else. You will have no trouble finding beer bottle caps that suit your beer (or your brand).
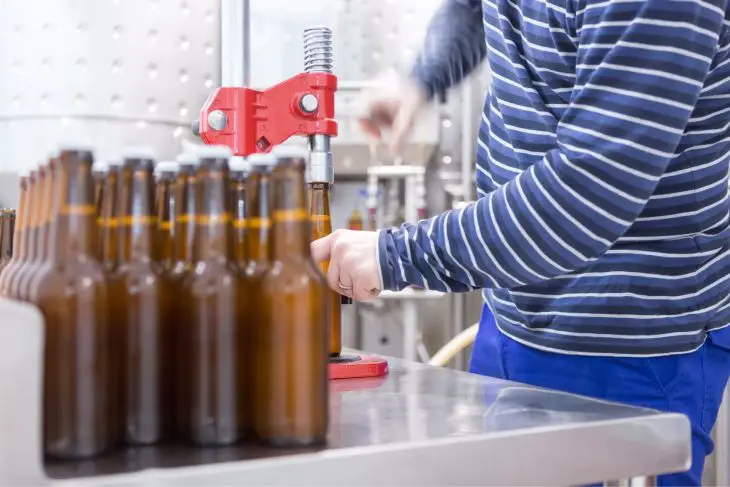
Bottle Cappers
Love bottling up your beer? Then you are going to need a capper. The handheld device is kind of like a hole puncher but for metal. Squeeze it, and you get a metal crown that tops the beer bottle. You can also find tabletop bottle cappers. Sturdier and faster than the handheld variety, you will be able to put caps on more bottles in the same amount of time. The downside is that tabletop cappers are more expensive.
The last level of cappers is an electric model. For those who plan on selling their beer, an electric capper will accelerate your bottling. It will be a wise investment.
Fillers
Also known as a bottle wand, a filler is how you can start or stop the flow of beer into a bottle. There are two kinds: spring-loaded valves or gravity-fed ones. The mechanics of both types work flawlessly and enable you to quickly fill bottles without mess.
A beer gun or spigot will also work well. You may have to pay a bit more for a beer gun, but it is convenient.
Drying and Storage Racks
As we say with everything, you are going to want to clean and sanitize the bottles or the keg before you package your beer. In a rush, you might forget to thoroughly dry the items. Leaving stray water behind is a no-no. That water is going to dilute the beer and may even mess with the flavor profile.
You can choose a tree-style rack or a flat rack. The former looks a bit like a coat rack. The latter has pegs that you can slip the upside bottles over so water trickles out onto the mat. If you are worried about saving space, you can buy stackable drying racks.
Labels
Planning on selling your beer? You are going to need a label. Sure, it is not essential, but it always helps to have a name and an image that people can associate with your beer. You can buy blank labels or order something special from a print shop. Labeling can be great fun, especially when you come up with fascinating names for your beer.
Homebrewing Extras That Level Up Your Equipment
As you start to get more comfortable with homebrewing, you may desire a more advanced setup. You can already make delicious beer with just a few pieces of gear, but if the urge to upgrade can’t be ignored, then this section is for you. The great thing about homebrewing is that you can experiment as much as you want. Having the equipment for that experimentation, though, is going to make more trials successful.
Here are some ways to expand your brewing equipment:
Keg and Carboy Washer
Nothing is as boring as washing equipment. You don’t want to waste even a second cleaning when you could be brewing beer. Thar is where a keg and carboy cleaner makes life easier. A washer means not having to dissemble your keg. You can also wash the more difficult to scrub pieces of gear, like thermometers, airlocks, and tubes.
Stainless Steel Mesh Hop Spider
Also known as kettle spiders, a hop spider might be one of the most underestimated tools of homebrewing. Basically, it is a mesh filter that hangs from the edge of the kettle. You can then add your hops into the spider so that the system doesn’t get clogged with organic matter. That is because after 60 minutes of brewing, the hops get mushy and may even shed some solids. That can get into the fermenter and beer, which won’t be appetizing.
With the hop spider, the hops are contained and strained, saving you both time and effort when homebrewing.
Refractometer
At the beginning of your home brewery escapades, a hydrometer is going to be an essential piece of your brewing equipment. You need a hydrometer for measuring things like the gravity of your wort. A refractometer, on the other hand, offers you a greater range of control over your beer, because you can measure things like specific gravity and the amount of sugars in the mixture.
The advantage? You can accurately track the conversion of starches during the mash. Depending on the readings, you can make tweaks to the mixture to get the exact flavors you want.
Water Testing Kit
We talk about it a lot at Sound Brewery—how water can either level up or downgrade your beer. Sure, you can whip up some luscious beer with tap water, but with variances in calcium hardness, alkalinity, and pH, you never know if your water is going to do you favors. That is why you need to test your water before delving into more complicated home brew recipes.
A decent water testing kit will have everything essential included. Once you have a full profile on your water, you can tweak it to match water types needed to specific kinds of beer. Or, you can correct mistakes before your beer gets ruined.
Wrapping Up
Ready to become a brewmaster? With the essential brewing equipment on this list, you will have everything you need to make one successful batch after another. You can always purchase the basics first, gain experience, then work towards upgrading your equipment over time. There is no rush—just flavorful, bubbly beer on the horizon. Happy brewing!
Recommended Reading
Bottling Homebrewed Beer Fast – An Essential How-To Guide
Here is some good news: an essential guide for bottling homebrewed beer faster than ever. Let’s get right to it.
Controlling Mash Temperature – An Essential How-To Guide
The best beer begins with the best mash; to get it, controlling mash temperature is key. Understand how temperature changes the very nature of the wort and control it!
Sweet Beers: Your Ultimate Guide to Drinking and Brewing Sweet Beers
If you are looking for more information on sweet beers, this Ultimate Guide to Sweet Beer will tell you everything you need to know and more.
The Ultimate Guide to Small Batch Brewing
Whether you are trying out homebrewing for the first time or simply want to make a smaller amount of beer for an experiment, micro batch brewing is an excellent method to use.
How To Make Alcohol Without Yeast – It’s Possible!
Whether you are making beer, wine, whiskey, or some kind of moonshine, yeast happens to be an integral part of the alcohol-making process. What happens, then, when you want to avoid using alcohol?
Choosing the Best Base Malts For Your Beer
What are base malts? Let's delve into of the malting process and learn how malting fits in with the homebrewing process.
