Hey there! This site is reader-supported and we earn commissions if you purchase products from retailers after clicking on a link from our site.
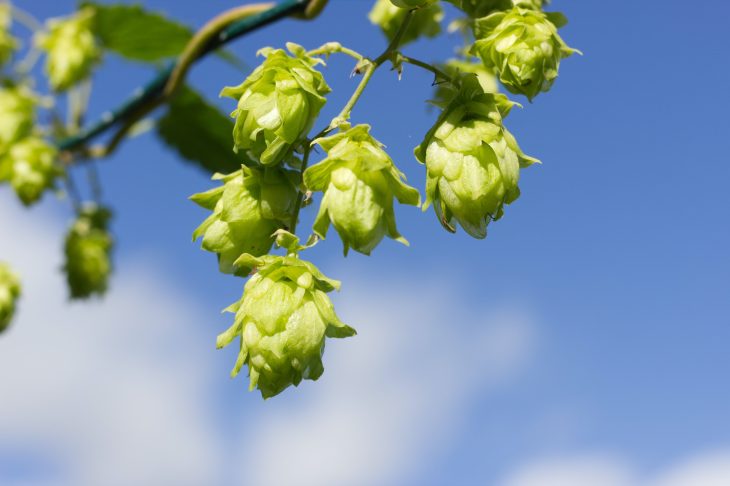
Whether you are a gardener or a home brewer, hops are a fantastic and easy plant to grow at home. You do not need a lot of space to start tending to the long, climbing vines of a hop plant, nor do you need to invest loads of time into getting cones to sprout. Knowing how and when to harvest hops, though, may still be a question you have. Good news. Those questions are about to be answered right now.
Generally, hops can be harvested between August and September, but there is a bit more to it than just plucking them at the end of the summer season.
Table of Contents
- When to Harvest Hops
- How to Harvest Hops
- How to Check The Ripeness of Hops
- Benefits of Knowing When to Harvest Hops
- Drying and Storing Hops
- FAQs
When to Harvest Hops
It’s today! The day you have been waiting for. All year you have been babying your hop plants. After watering, pruning, and caring for these green stalks, they are now loaded with cones and ready to go.
But how do you know exactly when to harvest your hops? Is there a specific calendar day for it?
Depending on where you live in the world, hop harvest season begins around the middle of August and extends into the middle of September. There are some places, however, when hops ripen up by the middle of July.
Now, here is the thing: You do not want to pry the hops from the bine—yes, that’s the correct spelling—too early. It is better to harvest slightly overripe hops than under-ripe ones. Hops that have not had time to fully ripen will be deprived of their aromatic and bittering acids.
How to Harvest Hops
Now that you know when harvest hops, you must next consider how you are going to go about it. Fortunately, harvesting hops is not an arduous task. You can pick first-year harvests by hand, or cut down the entire bine and proceed from there. It’s recommended that you pick your hops by hand for the first harvest, because the plants have not fully matured. The amount of hops will be less than what you get every year after that.
If you plan on cutting down the hop stalk, be sure to leave about 2-3 feet of it above ground. You do not want to injure the root system or the crown of the plant. First year bines are still establishing this elaborate system, and so you do not want to stunt their growth.
Otherwise, cutting the bines down will help the plant store vital nutrients for the winter. If all goes well, the mature plant will gift you with 1-2 pounds of hops each season.
Check out this video from Northern Brewer on how and when harvest hops the right way:
Make sure you are wearing protection when working with hops. The plants are covered in little hairs that can cut and irritate your skin. Gloves, goggles, and appropriate footwear are highly recommended.
How to Check The Ripeness of Hops
Knowing when to harvest hops boils down to knowing when they are ripe. Here is the best methods for checking the ripeness of the cones:
- Conduct a squeeze test. While the cone is still connected to the vine, give it a slight squeeze. The cone will stay compressed if it still has some ripening to do. If the cone is light and dry and springy, then it is ready to be plucked.
- The sniff test. If the squeeze test was unconvincing, the next step is to pluck a cone and put it in the palm of your hand. Roll it around then take a whiff. If the hop smells a bit like onions and a freshly mowed lawn, it’s ready.
- Try the chirp test. This one is cool: Roll the hop around by your ear. Does the hop sound a bit like a cricket? It’s harvest time.
- Seek out lupulin, the yellowish stuff on the outside of the cone. Yellow indicates ripeness. On the other hand, if the lupulin goes orange and smells foul, throw it away.
Benefits of Knowing When to Harvest Hops
For those who intend to use their hops for beer, knowing the ideal picking time is important for a couple of reason. You want to ensure that the hops provide the best flavor and aroma, and so having high quality hops is essential. Here are some benefits to picking your hops at the height of the season:
Beer Quality Improves
Brewers know what it means when they hear, “Timing is everything.” Well, it’s true for hops, too. As mentioned earlier, you never want to use under-ripe hops in your beer. It will come out lackluster. Instead, learn when your hops are just reaching that point of overripe-ness before picking them. The quality of your beer will dramatically improve, simply because the hops had more time to develop.
Bitterness, Aroma, and Flavor is Enhanced
Hops, as you are aware, play a major role in many beer recipes. They are used to add aroma and bitterness to a beer. Depending on the type of hop, different flavors and scents are imparted on the brew. In order to get the most depth and dimension in your beer, aim for hops that have the optimal amount of lupulin.
Do not make the mistake of plucking the hops from the bine too early. No amount of under-ripe hops in your wort will make up for a lack of lupulin.
Greater Hop Yield
Knowing when to harvest hops also increases how many hops you get the following year. That alone is a good reason for picking hops at the right time. Plus, this ensures you are getting the freshest, most flavorful hops for your home brew.
Drying and Storing Hops
Good, you have gathered your hoppy harvest and now you are ready to do one of two things with them. Either you are going to brew a batch of wet-hopped beer straightaway, or you are going to dry and store those hops.
Since fresh hops contain about 80% water (this is also a way to tell when to harvest hops), you will need 4-6 times more for a batch of beer than you would with dried hops. In other words, 4-6 ounces of wet hops is the same as an ounce of dried hop pellets. For those who want to be economical with their hop harvest, you may want to dry them out just so you can use less.
The good news is that drying them for later decreases the amount of water to about 10%, which is on par with commercially grown hops. This also means you can predict how much alpha acids are in your hops.
Considerations for Drying Hops
There are four things you do not want to overlook when drying your freshly harvested hops: moisture, heat, time, and light. You want to avoid oxidation and isomerization, so the drying process needs to move swiftly—lasting no longer than 3 days in total. Furthermore, you do not want the temperature to be above 140 degrees F (60 degrees C). That temperature threshold is crucial to preserving the aromas and flavors in the hops. Any hotter than that, and the hops will lose their complex flavors.
Lastly, do not let the moisture content dip below 8-10%. If your hops lose all moisture, there is a chance of mold growth.
How do you know if your hops are dry enough? Break the central stem. It should be brittle and snap right in half. Powdery lupulin will also fall from the cone when touched. The hop should still be springy and a little papery but not crumbled and brown.
Ways to Dry Your Hops
There is more than one way to go about drying and storing hops. Here is a video that features 10 different ways:
Two of the easiest methods include using a food dehydrator or a drying screen.
The food dehydrator is one of the least complicated methods, because it allows for the hops to dry without getting overcooked. If you can go this route, do.
Hop drying screens are best for smaller batches of hops. Place your hops on the screen near a window or vent—somewhere dry but warm. You can also place some landscaping fabric over them to dry them in the dark. Occasionally roll the hops around so that the moisture trapped in the inner part of the cone starts to dry. Leave the hops on the drying screen for a couple of days.
Storing Your Harvested Hops
So you have mastered when to harvest your hops and dry them out. Now its time to package them for use later on. First, you have to weigh your hops. Separate them into small freezer-safe bags—1 to 2 ounces each.
It is recommended that you use something airtight for storage. Any oxygen trapped in the bag when you put it in the freezer may contaminate the hops. Then toss the hops in the freezer, as that will extend their shelf life to about 3 years. If you wish to store your hops at room temperature, they will stay good for about 2-3 months before losing their flavor and bitterness.
It’s Time For a Hoppy Harvest
Harvesting hops comes down to knowing how and when. The best time is mid-August to mid-September, and you can conduct a couple of tests, like squeezing and smelling, to see if they are ready for harvesting. Once you have your hops harvested, there are many options. Whether you opt to brew with them immediately or save them for a rainy day, bringing in all those hops is sure to put a smile on your face.
FAQs
You will know when a cone is ripe by conducting the squeeze test. Give the hop a slight squeeze with gentle pressure. If the cone remains compressed, it is not yet ripe. A hop is ready for picking when it is light and dry to the touch and springs back to its original form.
It takes hops between 24-48 hours to dry out. If you wish to accelerate the process, you can use a fan or a food dehydrator. Generally, you do not want drying to last any longer than 3 days, because oxidation and isomerization will start to occur.
Hop plants are hardy and do not need a lot of pruning to survive the winter. However, you should consider cutting them down to about 4-6 inches above ground. Your hop plants are perennials, meaning it will come back next season. Before the ground gets too hard, loosen the soil around the plant. That is all you need to winterize your hop plants after harvest.
Recommended Reading
Bottling Homebrewed Beer Fast – An Essential How-To Guide
Here is some good news: an essential guide for bottling homebrewed beer faster than ever. Let’s get right to it.
How To Make Alcohol Without Yeast – It’s Possible!
Whether you are making beer, wine, whiskey, or some kind of moonshine, yeast happens to be an integral part of the alcohol-making process. What happens, then, when you want to avoid using alcohol?
Brewing With Lactose: The Ultimate Guide
Lip-puckering, bitter-as-heck beers... Lactose brewing is something you may want to try if you want to develop your own home-brewed milk stout.
The Best Mini Kegerators For Your Homebrew
Mini kegerators are convenient, portable, and most of all, very easy to use. You should at least now know what to look for when shopping around for a portable keg dispenser for yourself or a beer-loving buddy.
Does Moonshine Go Bad? What You Need to Know
Did you finally pull that gifted homemade moonshine from last year out from the back of the refrigerator? You may be wondering, “Does moonshine go bad? Is this fit to drink?”
Lager Temperature Control Tips For Homebrewing
Lager temperature control can be difficult if you have just started brewing out. Learn more in the article!
