
The hop stands vs whirlpool hops debate trips up brewers all the time, but these post-boil techniques are basically close cousins that’ll completely transform your beer’s flavor profile. The key difference comes down to temperature and timing—nail those variables, and you’re extracting juicy tropical character instead of harsh bitterness. Most recipes throw around these terms interchangeably, which creates confusion about what’s actually happening in your kettle. Understanding how each method pulls different essential oils and alpha acids from your hops means you’ll finally dial in that exact hop profile you’re chasing, whether that’s soft and fruity or bold and resinous.
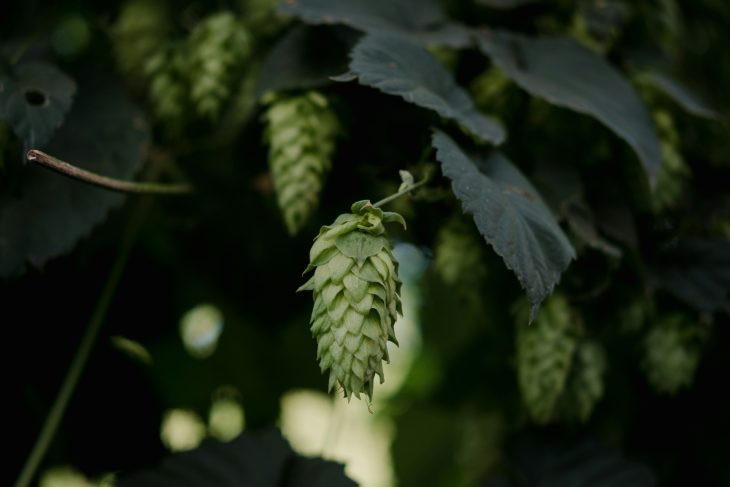
What Is a Hop Stand?
Think of a hop stand like brewing tea—except you’re doing it at the end of your beer-making process when the heat’s off. Once you’ve finished boiling your wort, you drop in the hops and let them hang out in that still-hot liquid for anywhere from 10 to 90 minutes before chilling everything down to fermentation temperature. Pro brewers sometimes call this whirlpool hopping, but for most homebrewers, it’s just about giving those hops quality time with your wort.
Here’s what makes it work: your wort temperature holds steady somewhere between flameout and cooling, usually hovering around 160°F to 212°F, depending on your approach. This sweet spot lets the essential oils—those flavor-packed compounds locked inside hop cones—dissolve into your beer while minimizing the vaporization that’d normally happen during a rolling boil. You’re getting all that aromatic goodness without cooking it off in your kitchen.
The alpha acids in your hops are still doing their thing during a hop stand, just at a slower pace than they would during a full boil. Since isomerization (that’s the chemical process that creates bitterness) ramps up with heat, you’ll pick up some IBUs from your hop stand additions, but it’ll be gentler bitterness compared to a 60-minute addition. Most brewers estimate about 10% utilization for hop stands, though the exact number depends on your temperature and timing.
Key Features:
- Hops added after the boil is complete (at flameout)
- Static steeping for 10-90 minutes before chilling
- Wort temperature typically 160°F to 212°F
- Extracts essential oils with minimal vaporization
- Contributes smooth bitterness (roughly 10% alpha acid utilization)
- No active circulation required
Related: The Brewer’s Guide to Understanding Hop Creep
What Are Whirlpool Hops?
Whirlpool hops get their name from what’s happening in your kettle. Professional brewers pump their hot wort into a vessel at high velocity—we’re talking 15 feet per second—creating a vortex that spins like a tornado. That circular motion relies on centrifugal force to push all the hop fragments and trub (that’s the protein gunk you don’t want) into a compact cone right at the center of the bottom. It’s basically physics doing your cleaning work for you.
But here’s the thing: as a homebrewer, you don’t need fancy pumps or whirlpool kettles to nail this technique. A big spoon and some elbow grease’ll get you there. Stir your wort in one direction for a minute or two until you’ve got a decent spin going, then step back and let the hop extraction happen. Commercial brewers might keep that circulation running, but your smaller batch volume means a simple initial swirl does the job.
The beauty of whirlpool additions is that they happen in that post-boil window when your wort’s still plenty hot but not actively boiling. You’re extracting hop character at temperatures that preserve more of those delicate essential oils while still pulling out flavor compounds. Some brewers add their whirlpool hops right at flameout when the wort’s still pushing 200°F, while others cool things down to 170°F or even lower before tossing in the hops.
Key Features:
- Creates circular wort movement via pump or manual stirring
- Uses centrifugal force to separate trub and hop material
- Continuous or initial circulation of hot wort
- Added post-boil at varying temperatures (120°F to 212°F)
- Improves wort clarity while extracting hop character
- Can be done with basic equipment (just a spoon)
Key Process Differences
Here’s where hop stands, and whirlpool additions split paths, even though people use the terms interchangeably. A true whirlpool keeps your wort moving—whether that’s through a pump system recirculating the liquid or manual stirring to maintain that spin. A hop stand? That’s all about stillness. You add your hops, maybe give everything one good stir, then cover your kettle and walk away.
This movement difference affects how your hops interact with the wort. Whirlpooling continuously exposes fresh wort to your hops as the liquid circulates, potentially pulling more oils and compounds into solution. A static hop stand relies on diffusion—those essential oils slowly working their way out of the hop material and into the surrounding liquid without any mechanical assistance.
Your equipment plays a role here, too. If you’re running a pump setup with temperature control, you can maintain precise whirlpool conditions for extended periods. Most homebrewers working with a basic kettle on a stovetop are doing hop stands by default. The good news? Research suggests both methods deliver solid hop character, so don’t sweat it if you can’t create a perfect whirlpool. Heat loss happens faster in a smaller homebrewing kettle versus a commercial system’s massive volume, which means your hop utilization naturally trends lower—but that’s easy to account for in your recipe planning.
Temperature Ranges Compared
Temperature isn’t just a number on your thermometer—it’s the master control for what you’re pulling from your hops. Right at flameout when your wort’s sitting between 190°F and 212°F, alpha acid isomerization is still cranking along at a decent clip. You’re building bitterness while also dissolving essential oils, though the high heat means some of those volatile compounds are escaping as vapor.
Drop down to the 160°F to 170°F range, and you’ve hit what many brewers consider the goldilocks zone. Alpha acid isomerization falls off dramatically below 175°F—we’re talking maybe 10-20% of the rate you’d see during a full boil. This means you’re extracting flavor and aroma without piling on IBUs. The essential oils still dissolve readily at these temperatures, but vaporization slows way down, so more of that hop goodness stays in your beer instead of floating out the top of your kettle.
Some adventurous brewers push even lower, chilling their wort to 120°F or 140°F before adding hops. At these temps, you’re barely touching the alpha acids—isomerization becomes negligible. The tradeoff? It takes longer to extract those oils, and you’ll need to extend your hop stand to compensate. The wort temperature you choose really comes down to what you’re chasing: if you want smooth bitterness with big aroma, start hot and let it cool naturally. If you’re after pure aromatic intensity with minimal IBUs, chill first and steep longer.
Flavor & Aroma Outcomes
The hop character you land on depends heavily on which essential oils make it into your finished beer and at what concentrations. Myrcene—the most abundant oil in many American hop varieties—brings that classic resinous, citrusy punch you taste in West Coast IPAs. It’s incredibly volatile, though, so high-temperature whirlpools or hop stands will drive off a good chunk of it. Cooler temperatures preserve more myrcene, giving you that herbaceous, green hop quality.
Linalool tells a different story. This compound survives the brewing process better than myrcene and delivers those floral, almost lavender-like notes with hints of citrus. Brewers targeting that juicy, soft hop profile you find in NEIPAs often work with cooler hop stands to maximize linalool retention. Then there’s humulene, which tends to stick around through the boil better than other oils and contributes woody, spicy, earthy characteristics—think noble hop varieties and Czech pilsners.
When you’re whirlpooling at higher temperatures (above 185°F), expect a more traditional hop character with noticeable bitterness backing up the aroma. Your beer might come across as sharper, cleaner, with that classic IPA bite. Cooler hop stands below 170°F tend to produce rounder, softer hop flavors—the kind of juicy, fruit-forward profiles that make you think “tropical” rather than “piney.” Neither’s better—they’re just different tools for different styles.
Related: What Are Cryo Hops? A Complete Beginner’s Guide to Ultra-Concentrated Hop Flavor
Bitterness Contribution
Here’s where things get a little fuzzy. Traditional IBU calculations rely on known isomerization rates during a full boil, but hop stands and whirlpool additions don’t play by those rules. The Tinseth formula—one of the standard models brewers use—assumes boiling temperatures, so it’ll overestimate your bitterness if you apply it directly to post-boil additions.
Most brewing software and experienced brewers peg whirlpool hop utilization somewhere between 3% and 15%, depending on temperature and time. Add hops at flameout when your wort’s still at 200°F and let them sit for 30 minutes? You might see 10-15% utilization, roughly equivalent to a 5-minute boil addition. Cool to 170°F first, and that drops closer to 5%. Get down to 140°F or below, and you’re looking at minimal IBU contribution—maybe 1-3% at most.
Professional brewers have demonstrated this in practice. Some brew entire beers using only whirlpool hops and still hit 25-30 IBUs from late additions alone. The key is adjusting your hop quantities to compensate for the lower utilization rates. If you’d normally add 2 ounces at a 10-minute addition, you might bump that to 3-4 ounces in the whirlpool to achieve similar bitterness. The IBU scale becomes more of a guideline than gospel with these techniques, which is why tasting and adjusting over multiple batches beats trying to nail the math perfectly on your first attempt.
When to Use Each Method
For classic West Coast IPAs and pale ales, where you want that assertive hop bitterness with big aroma, a hot whirlpool right at flameout delivers. The higher temperature extracts plenty of essential oils while still contributing to your IBU target. You’re building a beer with backbone—one that doesn’t shy away from showing off both the bitter and aromatic sides of your hops.
NEIPAs and hazy IPAs practically demand the cooler hop stand approach. These styles thrive on soft bitterness and explosive fruity, juicy hop character. Chill your wort to 160-170°F, add massive hop quantities, and let them steep for 20-30 minutes. You’ll pull out those tropical, citrus-forward flavors without the sharp bitterness that’d clash with the style’s pillowy mouthfeel.
Don’t sleep on these techniques for less hop-forward beers either. Belgian styles, saisons, and even some lagers can benefit from a quick 10-15 minute hop stand at moderate temperatures. You’re adding aroma complexity without overwhelming the other flavors at play. The whirlpool also serves a practical purpose in any style—it helps clarify your wort by consolidating trub, making your transfer to the fermenter cleaner, and reducing the amount of sediment that makes it into your finished beer.
Making the Choice for Your Next Brew
Both hop stands and whirlpool additions occupy the same territory in your brewing process—that critical window between boil and chill where you’ve got one last shot at extracting hop character. The real difference comes down to whether you’re actively moving the wort or letting it sit still, but honestly? For most homebrewers, the terms are basically interchangeable, and your results will be more about temperature and timing than whether you’re stirring or not.
Temperature is your main lever here. Hot additions above 185°F give you bitterness plus aroma. The middle zone from 160-175°F minimizes IBUs while maximizing flavor extraction. Go cooler than 160°F, and you’re in pure aroma territory, though you’ll need to extend your steep time to compensate. Pick your temperature based on what your recipe needs—there’s no universal “right” answer.
Start experimenting with a simple rule: for hop-forward beers, dedicate at least as much (if not more) hop weight to your whirlpool or hop stand as you do to your boil additions. You’ll be amazed at how much character you can build in those 20-30 minutes of contact time. Keep notes on your temperatures and timing so you can dial in exactly what works for the flavors you’re chasing. These brewing techniques might seem fussy at first, but they’re actually your ticket to unlocking those complex, saturated hop profiles that make modern craft beer so damn compelling.
Nail Your Hop Game Every Time
You’ve now got the complete rundown on hop stands and whirlpool additions—they’re basically the same post-boil technique, with one using movement and the other sitting still. The real secret? Temperature controls everything. Go hot above 185°F for bitterness plus aroma, hit that sweet spot around 160-175°F for maximum flavor with minimal IBUs, or drop cooler for pure aromatic punch. Want a classic West Coast bite? Add hops at flameout. Chasing that juicy NEIPA vibe? Cool down first and let those essential oils shine. You don’t need fancy equipment—just a thermometer, some patience, and a willingness to experiment. Start playing with these techniques on your next brew day and watch how dramatically you can transform your beer’s hop character.
FAQs – Hop Stands vs Whirlpool Hops
Whirlpool hops go into hot wort right after the boil, typically between 160°F and 212°F, extracting flavor and aroma while still contributing some bitterness. Dry hopping happens in the fermenter after fermentation, using cold temperatures that pull out pure aroma with minimal bitterness. Whirlpool additions give you more flavor extraction due to heat, while dry hops deliver that fresh, raw hop smell without affecting your IBUs significantly.
Yes, whirlpool hops add bitterness, but less than boil additions. Alpha acid isomerization still happens above 175°F, just at a slower rate. Expect roughly 3-15% utilization depending on temperature—hotter whirlpools around 200°F contribute more IBUs, while cooler additions below 170°F add minimal bitterness. It’s smoother, softer bitterness compared to traditional 60-minute additions, perfect for balancing hop-forward beers.
Neither’s objectively better—they’re different tools for different jobs. Hop extracts offer precise alpha acid control and consistent bitterness without adding plant material, making them popular for bittering additions in commercial brewing. Whole hops and pellets deliver better aroma and flavor complexity since they contain all the essential oils and compounds intact. Most homebrewers prefer pellets or whole hops for character, saving extracts for when precise IBU calculation matters most.