Hey there! This site is reader-supported and we earn commissions if you purchase products from retailers after clicking on a link from our site.
Whiskey making is a process that dates back to at least one thousand years. Although, in all likelihood has been around longer. Either way, its origins lay in the lands of Scotland and Ireland following the migration of distillation from mainland Europe. For this reason, Scotch and Irish whiskey varieties are two of the most iconic varieties that can be found.
That said though, American whiskey, Canadian whiskey and many other distinct types of whiskey are also popular around the world. With that in mind then, you may have a desire to try your hand at making some whiskey of your own. If so, don’t worry! Below, we’ll outline how to make whiskey.
Table of Contents
- Is It Legal To Make Your Own Whiskey?
- The Process Of Making Whiskey From A Store-Bought Bottle
- The Process Of Making Whiskey From Scratch
- Answered: How to Make Whiskey at Home in 7 Steps
- But How is Scotch Whisky Made in Bulk?
- How to Make Whiskey (and build a Distillery!)
- FAQ – How to Make Whiskey at Home in 7 Steps
Is It Legal To Make Your Own Whiskey?
When it comes to making your own homemade whiskey, there is something very important that you will need to consider and determine before you begin this process. This of course is whether it will be legal or not for you to make whiskey from scratch or not. The reason for this is that in many regions of the world you will need to have a licence in order to distil alcohol.
The reason for this is that the distilling process can be incredibly dangerous for an assortment of different reasons. For example, the distilling process brings alcohol vapours and heat sources together in close proximity. The result of which is that when a still is not properly used or someone attempts to use a homemade still for alcohol production the risks of an explosion are incredibly high.
In addition to this, when you are producing alcohol using a still there is a risk of creating a beverage that is incredibly toxic. As such, consumption of said alcohol may cause you to be very ill and lead to severe health problems such as blindness. Additionally, the consumption of badly made alcohol may even be lethal.
The Process Of Making Whiskey From A Store-Bought Bottle
With the above in mind, you may be put off the idea of making your own homemade whisky from scratch. However, that doesn’t mean that you can’t take a half step by oak barrel ageing and/or flavouring a bottle of whiskey from a store. When doing so, the bottle of whisky you elect to use is really up to you. Your option varying from a nice single malt whiskey to a lower-shelf liquor store bottle. The reason for this is that the mini oak barrels and any flavouring infusions you use will greatly impact the final product.
Now, of course, many purists may find that is cheating. However, many larger liquor brands will own multiple smaller brands. Each of which will typically be distilled in the same distillery. Following this, it will be aged or customised to a different specification before being bottled and sold. One example of such is the United States Distilled Products Company which has a multitude of different alcohol brands under them.
With that in mind then, you may be wondering what direction you should go for in order to make a bottle of whiskey something of your own. Fortunately, there are a few great ways in which you can do so. Some of which include the following:
- Whiskey Selection
- Barrel Aging
- Bottle Aging
- The Addition Of Flavours
Whiskey Selection
As mentioned above, the whiskey selection that you pick isn’t necessarily something that will make or break the final product. That said though when you are selecting a whisky to use as your base, the one that picks will invariably lead to different results.
As such, if you particularly wish to make a bottle more your own than a whisky that is closer to raw whiskey is a good choice. This being whisky that has yet to be aged. An example of such is a whisky along the lines of Mellow Corn. The reason is that you can age it quite simply when making your own whisky. Additionally, something like this will have a less intense initial flavour, as such newly infused ones will be much more prominent.
For a slightly more tricky but even more customisable variation, using raw whisky is an interesting option. The reason for this is that this white unaged whisky will be something of a blank slate for you to truly make your own. However, when doing so, the onus is really on you to make it into something delicious. Acquiring raw whisky is something that is surprisingly quite simple to do. The reason for this is that raw whisky, otherwise known as “white” or “moonshine” versions is sometimes available from local distilleries.
On the other end of the spectrum though, you can also use a bottle that you are already fond of. The reason for this is that it is a great foundation when you are first dipping your toes in. The reason is that if you have a type of whisky you already really enjoy, you can try ageing it slightly further to bring out some delicious extra flavour. Alternatively, you can also infuse it to give it some extra flavour layers. One example of such is that Jim Beam Red Stagg is regular Jim Beam infused with black cherries.
Barrel Aging
When it comes to ageing whisky, using charred barrels made from oak is the traditional way. As such, many modern whisky makers will use this technique. With this in mind then, when you are putting your own whisky through the aging process, then following suit is an excellent way to add some aged character to the whisky.
When you are planning to use this method though, you will need to be cautious about the size of the barrel that you use. The reason is that filling a fifty-five-gallon barrel will require significantly more whiskey than just a bottle or two. As such, buying the appropriate amount of whisky that has been through the ageing process, distillation process and fermentation process before being sold will be much more expensive. Although, if bought wholesale or directly from a distillery you may be able to get the alcohol at a reduced price.
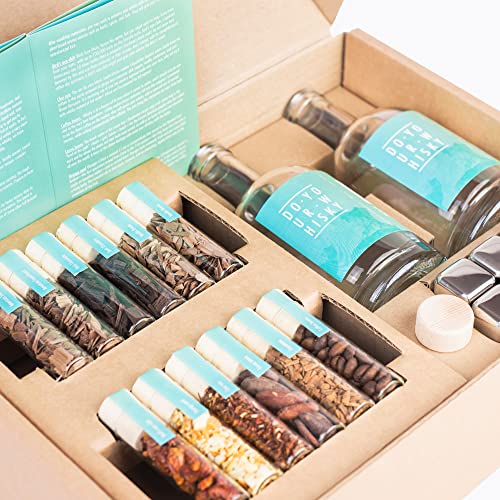
If not wanting to make a massive batch then this can actually be accomplished surprisingly easy. The reason is that kits for barrel ageing whisky are readily available online. These will be smaller barrels that are ideal for ageing a small amount of whisky. This being especially true due to how the larger relative surface area will mean that the whisky will come into contact with oaky more regularly. As such, more of the charred oak’s characteristics will become present within the whisky.
Additionally, when it comes to the location where you leave the whisky to age, you should be sure to pick the correct spot. The reason being that the external factors surrounding your whisky will directly impact the final taste. As such any odours, it is exposed to will impact the flavour, meaning a basement will likely be better than a garage. Additionally, changes in temperature will also lead to a more varied and nuanced flavour in the whisky. With this in mind then, you should also avoid climate-controlled areas and instead place the barrel in a location prone to temperature changes.

Bottle Aging
If though, you are wanting to age some whisky quickly or lack the space to dedicate to a barrel then there is another option for ageing your whisky. This option being to bottle age your whisky instead of barrel ageing it. To do this is actually quite simple and essentially involves inverting the process of barrel ageing. This means that instead of putting the whisky in an oaky barrel, you immerse some smoked wood within the whisky itself. Following this, simply seal the bottle of your whisky and the oak piece contained within.
The process of doing this is quite a space-efficient process. The reason for this is that all you need to do for this process to work is to simply open a bottle of whisky and plop a piece of charred oak inside before resealing it. Alternatively, instead of using the whisky bottle itself, you can use a mason jar.
The process of doing so will also be incredibly quick. The reason for this being that more of the whisky will be in direct contact with the wood itself. As such, when left to age the process will occur much more quickly. As such, when you are using this method, clear results will be visible within a mere matter of days. Meanwhile, unlike with barrel-aged whisky, the maximum amount of flavour from the wood will likely have been achieved within around six weeks.
The Addition Of Flavours
Perhaps one of the most conspicuous ways in which you can alter the taste of the whisky is by exposing it to new flavours. This is a process that can be achieved in a multitude of different ways.
Now, of course, one of the options for how you can do this is with your choice of wood. As mentioned earlier using a smoked piece of oak wood is a great option. In particular, some wood that has been seasoned before being toasted or smoked is a great way to bring even more nuance to your whisky.
However, another option is to use maceration to add even more distinct flavours to your whisky. To accomplish this, all you need to do is gather the herbs, spices or any fruit you wish to flavour the fruit with. Following this, you should then place them into a teabag and plop it into the whisky. When doing so, you will allow the tea bag to steep within the whisky and thereby allowing the flavours located within to fully leech into the spirit. This might seem odd. However, this isn’t too far away from how flavoured gin or spiced rum is created.
Now, this process can be sped up with the application of heat or allowed to happen gradually. Which you pick though will ultimately depend on how much control you wish to exert over how intense this added flavour is. The reason is that allowing it to happen gradually will give you the chance to occasionally taste test the whiskey.
The Process Of Making Whiskey From Scratch
Now the above information is all related to how you can use a pre-existing bottle of whiskey as a base for your “homemade” whiskey. However, if you are in a location where you can distil alcohol at home or have a license for doing so; then you may want something more in-depth. Now, this is a much longer and more elaborate process when compared to the aforementioned method. That said, to make a whiskey that is truly your own, you will want to undertake the following steps:
- Deciding Your Base Ingredient
- Cooking Your Ingredients
- Fermentation Of Your Whiskey Mash
- Distillation Of Your Whiskey Mash
- Determining The Safety And Taste Of Your Whiskey
- The Ageing Process of Your Whiskey
- Finishing And Bottling Up Your Whiskey
1. Deciding Your Base Ingredient
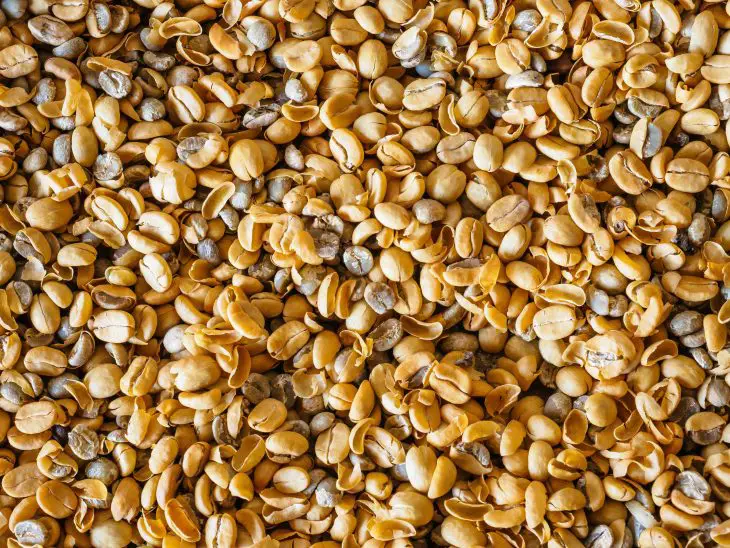
When you are planning to make your own whiskey it is important to decide before you begin on the type of whiskey you wish to create. This is because whiskey is an alcoholic beverage derived from grains as its raw materials. As such, the type of grain which you choose will greatly impact the flavour of your final drink. With that in mind then, the choices are between rye whiskey, corn whiskey, wheat whiskey or malted barley whiskey.
Which you go for isn’t really to do with the quality of whiskey a particular grain will produce. Although lower-shelf whiskeys more commonly use corn that doesn’t necessarily mean that it is of an inferior quality for example. Additionally, when it comes to making your initial mash bill it will consist of around fifty-one percent corn anyway. The rest of which though can consist of any of the other aforementioned grains. As such, when deciding on a grain, you should see if your favourite whiskeys use the same type of grain. If so, then that should be a clear choice for your base grain ingredient.
2. Cooking Your Ingredients
When you have decided to initially make your mash bill, you will first need to cook the corn. The reason is that doing so will break down the starches within the corn into sugars for fermentation. In order to do so, you will first need to bring your mash to a boil. Following this, it will need to be kept at a boil which is maintained until the resulting liquid is ready.
Once this cooking phase is over though, the mash will need to be cooled incredibly quickly for the best results. That said, it can be hard to tell exactly how much time is required for the starches to be broken down so you may end. Especially since in comparison to making whiskey on an industrial scale, it is difficult to gauge the process without the typical specialised equipment.
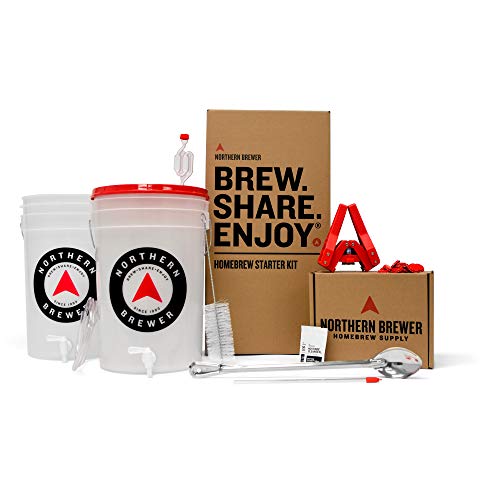
With that in mind then, when you are undertaking the process of cooking your own corn mash, using a beer homebrewing kit can be helpful. The reason for this is that when you are home brewing whiskey, the process of doing so will be initially, near enough identical to that of making beer in your own home.
3. Fermentation Of Your Whiskey Mash
When you have cooked your corn, it is time to start fermentation. Before doing so though, you will need to make your mash bill into an actual mash. The easiest way to do this is to use a rolling pin.
Following this, it is time for you to begin the fermentation process for your whiskey mash. This can once again be done with beer making kit in order to make the process much easier. The reason for doing so is that when you are fermenting your mash it will need to be kept in a controlled environment. The reason is that when you are doing this process overheating will kill the yeast. As such, the fermentation equipment found in a beer-making kit will be ideal.
As you can imagine though, when you are fermenting your whiskey mash, the way to do so is to add yeast. Following this, they will need to be kept in a mostly airtight container. The process of doing so though will involve the yeast eating the sugar and creating alcohol as a byproduct. When doing this though, there are different yeast strains that you can use. Each of which can bring yet more flavour to the whiskey. As such, finding out some of the yeast strains that add flavours you will like will you help you to truly make the good stuff.
Following the set up though, the next thing you need to do is wait. Now, the precise amount of time will vary from mash to mash. This being due to the fact that homebrewing will invariably be a less precise process than that which is done at a distillery. That said though, it should only take around a week or two for the sugars to have fermented.
As you go though, you should occasionally taste test a little bit of your mash to figure out what stage it’s at. When it’s still sweet, there will be more work left to do. However, once it has gone sour, the sugar should have been eaten up entirely by the yeast. If in doubt though, trying some of the mash at a local distillery can help you to more accurately gauge it by comparison.
4. Distillation Of Your Whiskey Mash
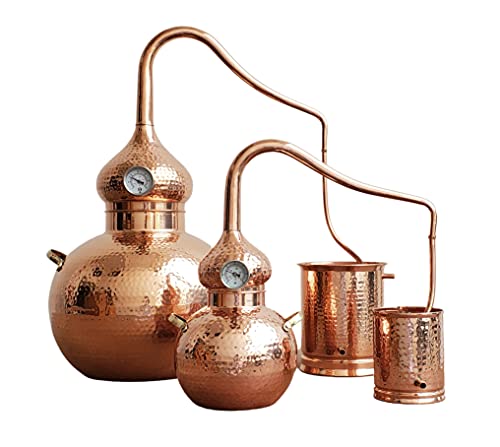
Once you’ve completed the fermentation stage of whisky-making, the next stage is distillation. Here is where things get more complicated and difficult as stills are not typically authorised for home use. If you are in a region where alcohol distilling at home is permitted though, you must still be incredibly careful. The reason is that getting the process wrong can lead to the whole batch becoming completely ruined.
More importantly, though, there is also a possibility that a still will can be incredibly dangerous. Especially since when you are dealing with alcohol vapours things can become incredibly flammable or combustible very quickly. As such, you should be sure to check every inch of the still for any leaks. If any are found though, you should be very thorough to ensure that they are dealt with before doing anything.
With that in mind then, you should probably avoid constructing your own still from scratch from an online tutorial. The reason is that this is not a process you should risk going wrong due to rookie mistakes. Instead, if you are going to distil some whiskey, you should instead purchase a small-scale still kit from a company that will specialise in their construction.
Once in the still, you will need to bring the temperature up to around one hundred and seventy-five degrees Fahrenheit (or eighty degrees Celsius). With a still kit, this should be easy to realise as many will come with an inbuilt thermometer. This process will vaporise the alcohol within the mash and thereby separating it.
After the alcohol evaporates it will be turned into its liquid form using a condenser. The way this works is that the cold water running around the alcohol will shock it back into the form of a liquid. Following this, the newly created raw whisky can be poured into a container. Alternatively, you can put the alcohol through the distillation process a few more times. The reason for doing so is to remove any remnant impurities and raise the alcohol content of your whiskey.
5. Determining The Safety And Taste Of Your Whiskey
When it comes to the whisky you’ve produced though, you should ensure that your whisky is safe to drink. In a five-gallon batch, you would typically throw out the first one hundred millilitres of alcohol. When making whiskey on a smaller scale this will likely be akin simply throwing out the contents of the first yield. The reason for this being that it can be dangerous to drink due to potentially containing something akin to pure methanol.
Additionally, though, the first yield is likely to be tainted by anything within the still. This typically means the previous things distilled in it. As such, the flavour you are striving toward will be contaminated. Fortunately though, by getting rid of the initial yield you will also be removing the contaminants. The reason for this being that this initial yield will have flushed the contaminants from the system.
6. The Ageing Process of Your Whiskey
Once you have distilled your raw whiskey and are satisfied with the purity it is time to benign the aging process. Now, you can of course call the raw whisky your whisky but for this to truly be so ageing is an important step. As mentioned above, this can be done in a couple of different ways. Either, it can be barrel-aged or potentially bottle-aged. Of course, barrel ageing is the more traditional way of doing so.
This can easily be done with a simple ageing kit available online. These will come with a small barrel that typically is made from oak wood that is smoked, toasted or charred. That said though, you may wish to use other types of wooden barrels for this such as cedar wood. When using a barrel, the process will be quite a slow and gradual one. As such, it can take at least a few weeks. The benefit of which is that you can taste-test the whiskey as it ages to decide when it is at a satisfactory point. Typically, when ageing whisky in this manner though, due to the larger surface area of the smaller barrel, the whiskey will age more quickly. Although, the process can still take months to reach its peak ageing.
Meanwhile, when you are using a bottle or mason jar to age whiskey, the process involves immersing a piece of wood directly into the liquid. The benefit of which is that it will take only a matter of days to reach a rich browned and aged state; with the maximum flavour from ageing in this manner occurring within around six weeks. Now, this is more convenient. However, due to being a less gradual process, you will have less precision in determining the final flavour.

7. Finishing And Bottling Up Your Whiskey
Once you have finished ageing your whiskey though, it is at a state that it is perfectly ready to eat. However, before bottling it up you may wish to add something extra to the spirit. Some option for which being to infuse the whisky by steeping ingredients such as spices or fruit into it. Alternatively, you may also wish to age it a second time in a different type of barrel. An example of this being to use a port barrel.
When you are completely satisfied with the spirit though, all that’s left is to bottle it. Following which, you will be ready to pour some out for yourself or to serve to guests.
Answered: How to Make Whiskey at Home in 7 Steps
As established above, making whisky at home is indeed something that is possible to do. However, it may be illegal to do so where you live due to the dangers of using a still. If so though, you can still customise a store-bought whisky or distillery-bought raw whisky to age yourself. Alternatively, though, you may wish to infuse it with new flavours. This can be done by steeping fruits, spices or a myriad of other options within the whiskey.
That said though when if you are able to use a still then you can make it from scratch. The process of doing so may be more complex. However, ultimately, you will be able to say that it is something that is completely your own.
But How is Scotch Whisky Made in Bulk?
Interested in how Scotch Whisky is made in large quantities too? Check out this video:
How to Make Whiskey (and build a Distillery!)
I had to include this video as it actually shows the process of not only making a whiskey, but making the whiskey distillery from the ground up! Love it!
FAQ – How to Make Whiskey at Home in 7 Steps
In theory, you can definitely make whiskey at home. However, in many places, the process of distillation is something you will need a license for or simply something that you can’t do at home. However, if it is legal where you live then the process of making whiskey from scratch can be quite rewarding. If it is prohibited though, then ageing or flavouring a pre-existing whisky is also a great option.
Whisky can be made from home by following the same steps a distillery would. These would be creating and fermenting a mash, distilling the liquor from the mash and ageing the raw whisky with oak. Alternatively, though, you can also age or flavour a pre-existing whisky is also a great option.
Whisky can be made by following the same steps a distillery would undertake to do so. These are to create and ferment a mash, distilling the liquor from the mash and ageing the raw whisky with oak.
The process of making whisky whilst quite elaborate doesn’t actually involve a large list of ingredients. In fact, it only really requires three ingredients. These being water, grains and yeasts.
Recommended Reading
What Is A Whiskey Chaser?
The term whiskey chaser is often bandied about in bars and pubs. However, if new to drinking, you may be wondering, what is a whiskey chaser?
7 Best Jack Daniel’s Flavors: Updated
If you are familiar with brands of alcohol, then you should have at least heard of Jack Daniels. Learn more about best Jack Daniel's flavors.
10 Best Whiskey For Beginners
Whether you end up preferring scotch whiskey or bourbon whiskey, it is nothing short of a mission that you should go on to explore and try all best whiskey for beginners.
What Does Whiskey Taste Like?
Whiskey is a favourite drink the world over. However, if you've never had it before then you may be wondering what does whiskey taste like?
Whisky Alcohol Percentage [For Scotch, Bourbon, & Rye]
While it is undeniably strong, the whisky alcohol percentage in a bottle can vary from company to company. The strength of whiskey can also be different depending on what type of whiskey it is in the bottle.
The Best Whiskey For Coke
If you’re looking for the best whiskey for coke—a classic combination, keep on reading! We’ve got recommendations for any budget.
