
Your beers taste different every batch, even when you follow the same recipe. The difference between good brewers and great ones isn’t just technique—it’s measurement. Beer testing equipment transforms guesswork into precision, letting you track fermentation progress, nail your mash pH, verify carbonation levels, and catch problems before they ruin your batch. From basic hydrometers that measure gravity to advanced dissolved oxygen meters that optimize yeast health, the right tools give you complete control over every stage of brewing. Learn exactly which beer testing equipment solves which problems and how to use each piece to brew consistently exceptional beer every single time.
Hydrometer
A hydrometer is a glass tube with a weighted bulb that measures the dissolved sugars in your wort. This straightforward tool becomes essential for tracking what’s happening inside your fermentation tank.
When you place a beer hydrometer into your wort, it measures specific gravity—how dense your liquid is compared to plain water. Your original gravity (OG) typically lands between 1.035 and 1.060 before fermentation. As yeast converts sugars to alcohol, that number drops to your final gravity (FG), usually between 1.005 and 1.015. The difference between these readings reveals your ABV measurement and confirms your fermentation is complete.
Key Tips for Accurate Readings:
- Check your hydrometer’s calibration temperature (usually 60°F or 68°F) and adjust readings accordingly
- Sanitize your beer thief before pulling samples to avoid contamination
- Spin the hydrometer to eliminate air bubbles that skew results
- Read at the meniscus—the bottom curve where liquid meets the stem
- Take readings only before pitching yeast and when fermentation appears complete
Refractometer
A beer refractometer measures sugar concentration in wort samples by analyzing how light bends through the liquid. This handheld device needs just a few drops to deliver a reading, making it faster and more efficient than traditional hydrometers that require full test jars.
Most brewing refractometers display results on the Brix scale, which indicates sugar content as a percentage. The big advantage here is speed—you can check your gravity during the mash or boil without pulling large samples or waiting for them to cool. However, once alcohol is present after fermentation starts, the refractometer needs a correction calculator since ethanol affects how light refracts through your beer.
Key Benefits and Tips:
- Requires only 2-3 drops of wort for accurate readings
- Automatic Temperature Compensation (ATC) eliminates most temperature corrections
- Perfect for quick checks during mashing and sparging
- Calibrate with distilled water before each brew day
- Use online calculators to convert Brix readings to specific gravity after fermentation begins
Related: All-Grain vs. Extract Brewing: Equipment and Process Differences
pH Meter
A pH meter measures the acidity levels in your wort and beer, which directly impacts enzyme activity, fermentation quality, and final flavor. Most brewers focus on mash pH since enzymes that convert starches to fermentable sugars work best between 5.2 and 5.6 pH.
Your beer pH tester uses a probe that measures electrical potential in acidic solutions. Digital meters with automatic temperature compensation give you accurate readings even when sampling hot wort from the mash tun, though cooling samples to room temperature always improves accuracy. Regular calibration with buffer solutions keeps your readings reliable.
Essential Usage Points:
- Calibrate before each brew day using pH 4.0 and 7.0 buffer solutions
- Store the probe in storage solution; never let it dry out
- Mash pH between 5.2 and 5.6 promotes optimal enzyme activity and flavor
- Cool samples before measuring for the best accuracy
- Replace probes every 12-18 months or when calibration becomes unreliable
Dissolved Oxygen Meter
A dissolved oxygen meter tracks the amount of oxygen in your wort and finished beer, which affects yeast health and beer stability. During fermentation, yeast needs oxygen for healthy growth—typically 8-12 ppm is ideal. But after fermentation, oxygen becomes the enemy, causing stale flavors and reducing shelf life.
These meters use optical sensors that measure oxygen through fluorescence technology. You’ll want to check oxygen levels right after aerating your cooled wort to confirm you’ve hit the target range. Too little oxygen and fermentation stalls; too much and you get excessive yeast growth that robs you of finished beer volume.
Critical Measurement Guidelines:
- Target 8-12 ppm dissolved oxygen in wort before pitching yeast
- Calibrate to zero using an oxygen-free calibration solution
- Monitor packaged beer to keep oxygen below 50 ppb for freshness
- Optical sensors require minimal maintenance compared to older polarographic probes
- Temperature affects oxygen solubility, so note your wort temperature when measuring
Spectrophotometer
A spectrophotometer measures how much light passes through your beer samples, revealing color intensity and optical density. Commercial breweries use these lab instruments to ensure batch-to-batch color consistency and verify that beers match their target specifications.
The device works by shining light through your beer sample and measuring which wavelengths get absorbed. This gives you precise color measurements on standardized scales like SRM (Standard Reference Method). Advanced units can also detect haze and suspended particles, helping you troubleshoot clarity issues.
Laboratory Applications:
- Provides accurate SRM color values for batch consistency
- Detects haze and turbidity in finished beer
- Verifies ABV through optical density measurements
- Used primarily in professional brewing labs
- Requires trained operators and regular calibration for accuracy
Microscope
A microscope lets you examine yeast cells and detect bacterial contamination before it ruins your batch. Homebrewers serious about quality control use basic compound microscopes to check yeast viability and spot unwanted microbes that cause off-flavors.
Looking at samples under 400x magnification, you can count viable yeast cells versus dead ones and identify common beer spoilage bacteria like Lactobacillus or Pediococcus. This becomes especially important when reusing yeast across multiple batches or brewing sour beers, where you need to monitor specific bacterial cultures.
Contamination Detection Tips:
- Use 400x magnification for yeast cell counts and bacteria detection
- Prepare samples on clean slides with proper staining techniques
- Check yeast viability before pitching to ensure healthy fermentation
- Monitor wild yeast or bacteria in sour beer cultures
- Keep microscope slides and coverslips sanitized to prevent false positives
Carbonation Tester
A carbonation tester measures CO₂ levels in your finished beer to ensure proper fizziness and bottle safety. These devices typically use a pressure gauge attached to a special cap that measures the dissolved carbon dioxide in sealed bottles or kegs.
Getting carbonation right matters for both taste and safety. Under-carbonated beer tastes flat and lifeless, while over-carbonation creates gushing bottles or even dangerous bottle bombs. Most beer styles target 2.2 to 2.8 volumes of CO₂, though some styles like Belgian ales or wheat beers go higher.
Carbonation Monitoring Essentials:
- Measure at serving temperature for accurate volume readings
- Target 2.2-2.8 volumes of CO₂ for most beer styles
- Wait at least two weeks after bottling before testing
- Use carbonation charts to convert pressure readings to CO₂ volumes
- Check multiple bottles from the same batch to verify consistency
Related: An Introduction to Home Kegging
Foam Stability Tester
A foam stability tester measures head retention and foam quality in your finished beer. While often found in professional brewing labs, these instruments quantify how long your beer maintains its foam and how stable those bubbles remain.
The testing process involves pouring beer into a standardized glass and measuring foam height over time, typically recording how many seconds it takes for the head to collapse to a specific level. Factors affecting foam include protein levels, hop compounds, glassware cleanliness, and carbonation levels.
Foam Quality Factors:
- Proteins from malt create a stable foam structure
- Hop acids and oils contribute to head retention
- Proper carbonation levels support better foam formation
- Glassware must be completely clean and free of oils
- Professional testers measure foam collapse time in standardized conditions
Temperature Controller
A reliable thermometer and temperature controller form the backbone of consistent brewing. Fermentation temperature dramatically affects yeast performance, flavor development, and final beer quality. Digital temperature controllers paired with heating or cooling systems maintain your target range throughout fermentation.
Accurate temperature measurement starts on brew day when you’re checking strike water and mash temperatures, then continues through fermentation, where even a few degrees off-target produces different esters and phenols. Modern temperature controllers use probes attached to your fermentation vessel that trigger heating or cooling to maintain your setpoint.
Temperature Control Essentials:
- Use multiple thermometers to verify accuracy across your system
- Digital controllers maintain fermentation within ±1°F of the target
- Ale fermentation typically runs 65-72°F, lagers 45-55°F
- Probe placement matters—attach to fermenter side, not in open air
- Temperature swings during fermentation create off-flavors and stressed yeast
Pressure Gauge
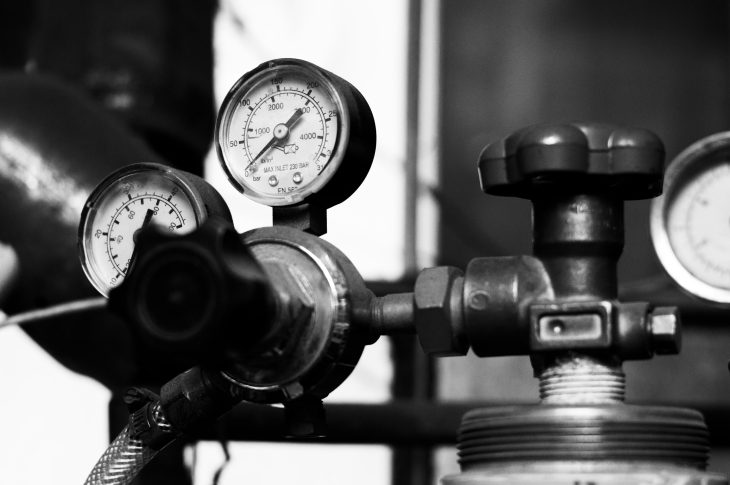
A pressure gauge monitors pressure in kegs and fermentation vessels, essential for proper carbonation and safe operation. These gauges attach to keg posts or fermenter lids and display pressure in PSI, letting you verify carbonation levels or monitor fermentation activity in closed systems.
For kegging, pressure gauges help you dial in the exact CO₂ pressure needed to carbonate your beer to the right volume. During fermentation, especially in pressure-capable fermenters, monitoring PSI prevents over-pressurization while letting you capture natural carbonation from fermentation.
Pressure Monitoring Basics:
- Serving pressure typically ranges from 10-14 PSI at 38°F
- Higher temperatures require higher pressure to maintain carbonation
- Pressure fermentation typically runs 10-15 PSI for specific beer styles
- Always include a pressure relief valve for safety
- Gauge accuracy degrades over time—replace or calibrate annually
Take Your Brewing From Guesswork to Precision
The right testing equipment transforms you from someone who makes beer into someone who crafts it with real confidence. Start with the essentials—a hydrometer and thermometer—then level up as your skills grow. pH meters and refractometers let you dial in mash efficiency and make real-time adjustments that directly impact your final product. For professional-grade consistency, add dissolved oxygen meters, carbonation testers, and pressure gauges to hit your exact specs every time. The beauty here is that each tool solves specific problems you’ve probably already faced—stuck fermentations, inconsistent carbonation, or batches that taste different every time. Invest in what addresses your biggest challenges first, and you’ll brew better beer more consistently than you ever thought possible.
FAQs – Complete Guide to Beer Testing Equipment
Yes, but with limitations. Refractometers work great for measuring sugar content in unfermented wort before you pitch yeast. They only need a few drops and give instant readings on the Brix scale. However, once fermentation starts and alcohol is present, you’ll need to use a refractometer calculator to convert the reading to accurate specific gravity. The alcohol changes how light refracts through the liquid, so the raw reading won’t be correct without mathematical correction.
Multiple tests are used throughout the brewing process. Specific gravity testing with hydrometers or refractometers tracks fermentation progress and calculates ABV. pH testing ensures proper mash chemistry and flavor development. Dissolved oxygen testing verifies adequate wort aeration and prevents oxidation in finished beer. Carbonation testing measures CO₂ levels for proper fizziness. Temperature monitoring controls fermentation conditions. Professional breweries also test for color consistency, foam stability, microbial contamination, and various flavor compounds to maintain quality standards.